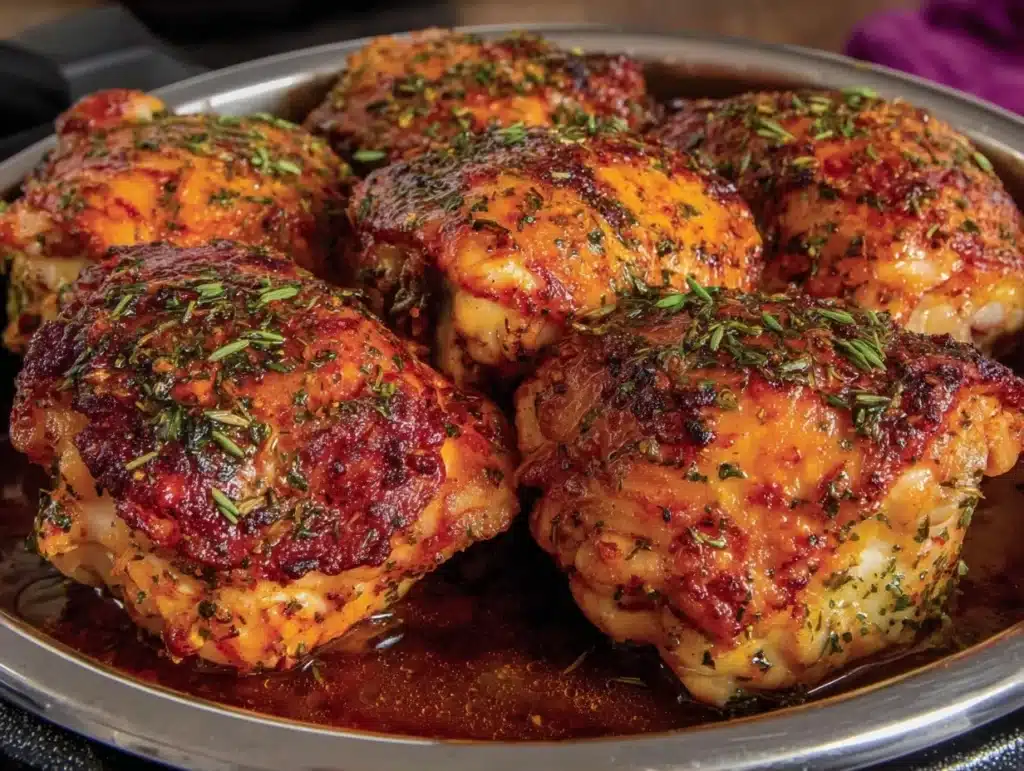
I still remember the Tuesday night I almost ordered takeout again. It was raining, I was exhausted, and the fridge looked like a desert. Then I remembered the chicken thighs sitting in the back of my freezer. They were frozen solid, but I had my Instant Pot ready to go. I didn’t have time to thaw them. I didn’t have time to sear them in a hot pan. I just needed dinner, and I needed it ten minutes ago. That night, I tossed the frozen thighs in with some broth, garlic, and dried herbs, hit the button, and went to take a shower. When I came back, the kitchen smelled like a restaurant. The chicken was falling-apart tender, and the sauce was rich and savory. I didn’t even have to clean a frying pan. Honestly, that meal saved my sanity. Now, this recipe for Tender Instant Pot Chicken Thighs is my go-to when life gets chaotic. It is the ultimate one-pot meal that delivers restaurant-quality results without the stress. You know how some recipes feel like too much work for a weeknight? This one doesn’t. It is forgiving, fast, and consistently delicious. I have made this over a dozen times, and it never fails to impress. Whether you are feeding a hungry family or just want a low-effort dinner for yourself, this dish delivers. The key is letting the pressure do the work while you relax. Let’s face it, we all need more meals that just work. This recipe proves that you don’t need to be a chef to make something amazing.
Why You’ll Love This Recipe
There are a few reasons why this specific method for cooking chicken thighs has become a staple in my kitchen rotation. First, it is incredibly forgiving. Unlike chicken breasts, which can turn into rubber if you overcook them by even a minute, thighs are tough little survivors. They have more connective tissue and fat, which breaks down beautifully under pressure. I learned this the hard way years ago when I burned a whole batch of breasts. Since switching to thighs, my weeknight dinners have become much more reliable. Here is what makes this recipe stand out from the crowd:
- Zero Thawing Required: You can cook straight from frozen. This is a game-changer for busy parents or anyone who forgets to plan ahead. The Instant Pot handles the temperature change easily.
- One Pot Cleanup: Seriously, you only need the inner pot. No searing pans, no cutting boards, no extra dishes. Just dump, press, and eat. This minimal cleanup makes it perfect for lazy nights.
- Restaurant-Quality Texture: The pressure cooking method forces moisture into the meat while keeping the juices locked in. The result is meat that is juicy, tender, and flavorful, not dry or bland.
- Flavor Infusion: Because the chicken cooks in its own juices plus the added broth, the flavor penetrates deep into the meat. It is not just surface-level seasoning; it is infused throughout.
- Versatile Base: This isn’t just plain chicken. The sauce created in the pot is perfect for serving over rice, pasta, or mashed potatoes. It turns a simple protein into a complete meal.
What really sets this apart is the simplicity. You don’t need fancy ingredients or special techniques. It is comfort food reimagined for modern life. It is the kind of meal that makes you feel accomplished without any of the effort. Plus, the smell that fills your house while it cooks is irresistible. It feels like a hug in a bowl. I love that I can prep this in five minutes and then have my evening back. It takes the stress out of dinner time and gives me more time to relax. Honestly, once you try this, you will wonder why you ever stressed over stove-top chicken.
What Ingredients You Will Need
This recipe relies on simple, wholesome ingredients that you likely already have in your kitchen. The beauty of a one-pot meal is that the flavors meld together without needing a complex spice cabinet. I like to keep it classic but robust, using herbs that pair perfectly with poultry. Here is what you need to gather:
- Chicken Thighs: Use bone-in, skin-on thighs for the best flavor, but boneless, skinless work too if you trim the fat. I recommend looking for organic or pasture-raised if possible, as the flavor is noticeably richer. You will need about 2 to 3 pounds.
- Chicken Broth: This forms the base of the sauce. Use a low-sodium version so you can control the salt level yourself. About one cup is perfect for creating steam and liquid for pressure cooking.
- Garlic: Fresh minced garlic is non-negotiable here. It adds a sharp, aromatic depth that dried powder just can’t match. Use about four cloves.
- Dried Herbs: I use a mix of dried thyme and dried rosemary. These earthy herbs complement the chicken beautifully. About one teaspoon of each is the sweet spot.
- Butter: A tablespoon of unsalted butter adds richness and helps create a silky sauce. It also helps brown the chicken slightly if you choose to use the sauté function first.
- Soy Sauce: Just a tablespoon adds umami and a nice savory depth. It isn’t meant to make it taste Asian; it just boosts the savory notes of the chicken.
- Lemon Juice: A splash of fresh lemon juice at the end brightens up the heavy flavors. It cuts through the richness and adds a fresh finish.
- Salt and Pepper: Generous amounts of coarse salt and freshly cracked black pepper are essential for seasoning the meat properly.
If you want to switch things up, you can swap the thyme for Italian seasoning. Or, if you like heat, add a pinch of red pepper flakes. The base recipe is flexible enough to handle your preferences. Just make sure your chicken is pat-dry if it is thawed, as this helps the seasoning stick better.
Equipment Needed
You really don’t need much to make this dish. The star of the show is obviously your electric pressure cooker, specifically an Instant Pot or a similar brand. I have used both the 6-quart and 8-quart models, and both work perfectly for this amount of chicken. The 6-quart is standard and fits most kitchens well. You will also need a measuring cup for the broth and a small spoon for the spices. If you want to sear the chicken first, you might want a pair of tongs, but it is not strictly necessary if you are in a huge hurry. Some people worry about the sealing ring absorbing garlic smells, but I find that a strong broth wash removes most of it. If you are concerned, you can keep a separate ring for savory dishes. A ladle is helpful for serving the sauce over rice or potatoes. Overall, the equipment list is minimal, which is part of the appeal. You aren’t digging out colanders, sharp knives, or large skillets. Just the pot and a few simple tools. This simplicity is what makes it a true one-pot meal. It keeps your counter clean and your mind at ease.
Preparation Method
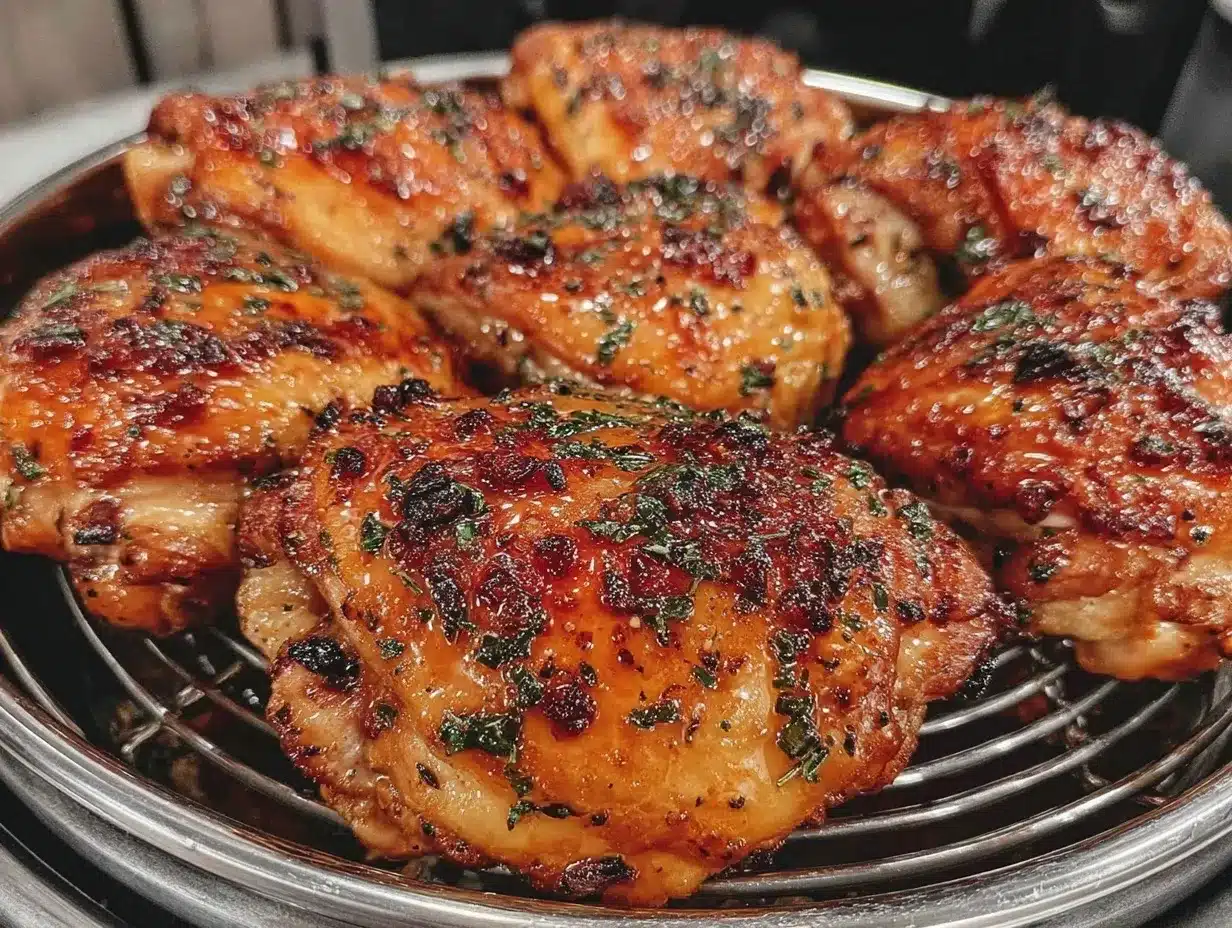
Getting this meal on the table is straightforward. Follow these steps carefully to ensure the best texture and safety. The whole process takes about 20 minutes of active time, plus the cooking and release time.
- Prepare the Chicken: If your chicken thighs are frozen, keep them frozen. If they are thawed, pat them dry with paper towels. This helps the seasoning adhere better. Season all sides generously with salt and pepper. This step is crucial for flavor, as the pressure cooker doesn’t evaporate moisture like an oven does.
- Add Liquid to Pot: Pour the chicken broth into the bottom of the Instant Pot inner liner. Then, add the minced garlic, dried thyme, dried rosemary, and soy sauce. Stir these together gently to create a flavored broth base. This prevents the garlic from burning if you use the sauté function.
- Place Chicken in Pot: Nestle the chicken thighs into the liquid. They should sit on top of the broth. You want them partially submerged but not completely drowned. If you have bone-in thighs, place them skin-side up if you want to keep the skin crispier, though the pressure will soften it slightly.
- Set the Pressure: Secure the lid on the Instant Pot. Make sure the valve is set to the “Sealing” position. This is a common mistake point; if it is on “Venting,” you will just be steaming the chicken, not pressure cooking it. Select the “Manual” or “Pressure Cook” button. Set the time to 10 minutes for boneless, skinless thighs, or 12 minutes for bone-in, skin-on thighs. Set the pressure to High.
- Cooking Time: The pot will take about 10-15 minutes to come to pressure. You will hear a hissing sound initially, which will stop once it reaches pressure. The timer will then start counting down. Use this time to chop vegetables or set the table. The cooking process is hands-off.
- Natural Release: Once the timer beeps, do not touch the valve immediately. Let the pot sit for 10 minutes. This is called a natural release. It allows the chicken to finish cooking gently and keeps the meat tender. If you quick release immediately, the chicken can become tough and the liquid might spray out. After 10 minutes, carefully turn the valve to “Venting” to release any remaining steam.
- Finish the Sauce: Open the lid carefully, tilting it away from you to avoid steam burns. Remove the chicken thighs and set them on a plate. You will notice a layer of fat on top of the sauce. You can skim this off with a spoon if you prefer a lighter sauce. Stir in the tablespoon of butter and the splash of lemon juice. Taste the sauce and add more salt or pepper if needed.
- Serve: Spoon the hot, buttery sauce over the chicken. Serve immediately with your favorite sides like mashed potatoes, rice, or steamed green beans. The chicken should be falling off the bone tender.
Cooking Tips & Techniques
There are a few tricks I have learned over time to make this recipe even better. First, do not skip the natural release. I know it is tempting to rush, but that extra ten minutes makes a huge difference in texture. The chicken continues to cook slightly during this time, which ensures it is fully done but not dry. Another tip is about the liquid amount. If you are using bone-in thighs, they release more water than boneless ones. You might not need the full cup of broth, but it is safer to start with a cup to ensure the pot doesn’t burn. The “Burn” error is the most common issue with pressure cooking. To avoid it, make sure there is enough liquid and that no large clumps of seasoning are sitting directly on the bottom of the pot. Stirring the spices into the broth before adding the chicken helps prevent this. Also, if you like a thicker sauce, you can mix a teaspoon of cornstarch with a tablespoon of cold water and stir it into the pot after removing the chicken. Turn on the Sauté function and simmer for a minute until it thickens. This gives you a gravy-like consistency that is perfect for pouring over everything. Finally, always check the internal temperature of the chicken. It should reach 165°F (74°C) for safety. Since thighs have more fat, they can go slightly higher without drying out, up to 175°F, which makes them even more tender. I usually aim for that higher range for the best mouthfeel.
Variations & Adaptations
One of the best things about this base recipe is how easily it can be adapted. You can change the flavor profile entirely with a few simple swaps. For a creamy version, stir in half a cup of heavy cream or coconut milk after opening the lid. This creates a rich, white sauce that pairs wonderfully with herbs like dill or parsley. If you are looking for a spicy kick, add a diced jalapeño or a teaspoon of cayenne pepper along with the garlic. This transforms the dish into something with a bit more heat and complexity. For a lemon-herb variation, increase the lemon juice and add fresh parsley at the end. This is lighter and brighter, perfect for spring or summer evenings. You can also add vegetables directly to the pot. Chunks of potatoes, carrots, or celery can be added along with the chicken. They will cook in the flavorful broth and become tender and delicious. Just be aware that this will increase the cooking time slightly for the chicken, so add an extra 2-3 minutes to the pressure time. If you are dairy-free, simply omit the butter and use olive oil instead. The recipe works perfectly without it. I often make a batch with chopped mushrooms, which absorb the sauce and add a meaty texture. The possibilities are really endless once you get the hang of the basic method.
Serving & Storage Suggestions
This dish is best served hot, straight from the pot. I love serving it over fluffy white rice or creamy mashed potatoes. The sauce is too good to waste, so having a starchy base to soak it up is essential. Steamed broccoli or green beans also make a great side dish to balance the richness. For storage, let the chicken and sauce cool completely before transferring them to an airtight container. They will keep in the refrigerator for up to four days. The flavors actually get better after a day or two as the chicken continues to absorb the sauce. To reheat, you can microwave individual portions for 2-3 minutes, or warm them gently in a saucepan on the stove. If you want to freeze this meal, it freezes beautifully. Place the chicken and sauce in a freezer-safe bag or container. It will last for up to three months. Thaw it in the refrigerator overnight before reheating. When you reheat it, you might need to add a splash of water or broth if the sauce has thickened too much in the fridge. Just stir it in and heat through. This makes it a fantastic option for meal prepping. You can make a double batch and have easy dinners ready for the week ahead.
Nutritional Information & Benefits
Chicken thighs are often misunderstood in the world of nutrition. While they have more fat than breasts, they also contain more iron, zinc, and B vitamins. The fat is mostly unsaturated, which is healthier than you might think. One serving of this recipe provides a good amount of protein, which is essential for muscle repair and satiety. The skin adds flavor and texture, but you can remove it before eating if you prefer to reduce the calorie count. The sauce is relatively low in sugar, especially if you use low-sodium broth and soy sauce. This makes it a suitable option for many dietary preferences, including low-carb or keto diets if you skip the rice or potatoes. The garlic and herbs add antioxidants and anti-inflammatory properties. I find that this meal keeps me full for hours, preventing the afternoon snack craving. It is a balanced, wholesome meal that doesn’t feel like “diet food.” It feels like real, satisfying comfort food that happens to be good for you. The natural ingredients mean you know exactly what you are putting into your body. There are no hidden additives or preservatives. It is just simple, clean food prepared with care.
Conclusion
This Tender Instant Pot Chicken Thighs recipe is more than just a way to cook dinner. It is a tool for reclaiming your time and enjoying your meals. It takes the guesswork out of weeknight cooking and delivers consistent, delicious results every time. I hope you try it and see how much easier dinner can be. Don’t be afraid to experiment with the variations to find your favorite flavor combination. Whether you stick to the classic herbs or go for something spicy and creamy, the method remains the same. I would love to hear how you like to make yours. Have you added any unique twists? Let me know in the comments below. Sharing your adaptations helps inspire others in the community. Also, if you made this, please take a photo and share it. Seeing your creations makes my day. Thank you for reading and for trusting me with your dinner plans. Happy cooking!
FAQs
Can I use chicken breasts instead of thighs?
Yes, you can, but you need to adjust the cooking time. Chicken breasts cook much faster and can dry out easily. Reduce the pressure cooking time to 6-8 minutes and always use a natural release. Thighs are more forgiving, but breasts work if you watch the time closely.
Why did my Instant Pot say “Burn”?
This usually happens if there isn’t enough liquid or if thick ingredients like tomato paste are stuck to the bottom. Make sure you have at least one cup of thin liquid like broth or water. Also, stir your spices into the liquid before adding the chicken to prevent clumps from burning.
How do I make the sauce thicker?
After removing the chicken, turn on the Sauté function. Mix a teaspoon of cornstarch with a tablespoon of cold water to make a slurry. Stir this into the simmering sauce and cook for 1-2 minutes until it thickens. This creates a nice gravy consistency.
Can I cook this from frozen?
Absolutely. This is one of the best features of the recipe. You do not need to thaw the chicken. Just add the extra 2-3 minutes to the cooking time if you are using bone-in frozen thighs. The pressure cooker handles the temperature change safely.
What sides go best with this chicken?
Mashed potatoes, white rice, and egg noodles are the classic choices because they soak up the delicious sauce. Roasted vegetables like asparagus or Brussels sprouts also pair well if you want a lighter meal. The versatility of the sauce makes it compatible with many sides.
Pin This Recipe!


Tender Instant Pot Chicken Thighs: Easy One Pot Meal
- Total Time: 45 minutes
- Yield: 4 servings 1x
Description
A forgiving, one-pot Instant Pot recipe for tender chicken thighs that can be cooked straight from frozen. This low-effort meal delivers restaurant-quality results with minimal cleanup.
Ingredients
- 2 to 3 pounds chicken thighs (bone-in, skin-on or boneless, skinless)
- 1 cup low-sodium chicken broth
- 4 cloves fresh garlic, minced
- 1 teaspoon dried thyme
- 1 teaspoon dried rosemary
- 1 tablespoon unsalted butter
- 1 tablespoon soy sauce
- Splash of fresh lemon juice
- Coarse salt and freshly cracked black pepper
Instructions
- If using thawed chicken, pat dry with paper towels. Season all sides generously with salt and pepper.
- Pour chicken broth into the Instant Pot inner liner. Add minced garlic, dried thyme, dried rosemary, and soy sauce. Stir gently.
- Nestle chicken thighs into the liquid, ensuring they are partially submerged.
- Secure the lid and set the valve to ‘Sealing’. Select ‘Manual’ or ‘Pressure Cook’ on High pressure.
- Set timer for 10 minutes for boneless thighs or 12 minutes for bone-in thighs.
- Allow the pot to come to pressure (approx. 10-15 minutes), then cook for the set time.
- Perform a 10-minute natural release, then carefully turn the valve to ‘Venting’ to release remaining steam.
- Remove chicken and set aside. Skim excess fat from the sauce if desired.
- Stir in butter and lemon juice. Taste and adjust seasoning.
- Serve chicken with sauce over rice, mashed potatoes, or vegetables.
Notes
Do not skip the natural release to ensure tender meat. If the sauce is too thin, mix 1 tsp cornstarch with 1 tbsp cold water and simmer on Sauté mode to thicken. Ensure there is enough liquid to prevent the ‘Burn’ error. Chicken should reach an internal temperature of 165°F to 175°F.
- Prep Time: 5 minutes
- Cook Time: 20 minutes
- Category: Main Course
- Cuisine: American
Nutrition
- Serving Size: 1 chicken thigh with
- Calories: 350
- Sugar: 1
- Sodium: 600
- Fat: 22
- Saturated Fat: 7
- Carbohydrates: 2
- Protein: 35
Keywords: Instant Pot, chicken thighs, one pot meal, frozen chicken, easy dinner, pressure cooker, weeknight dinner, comfort food