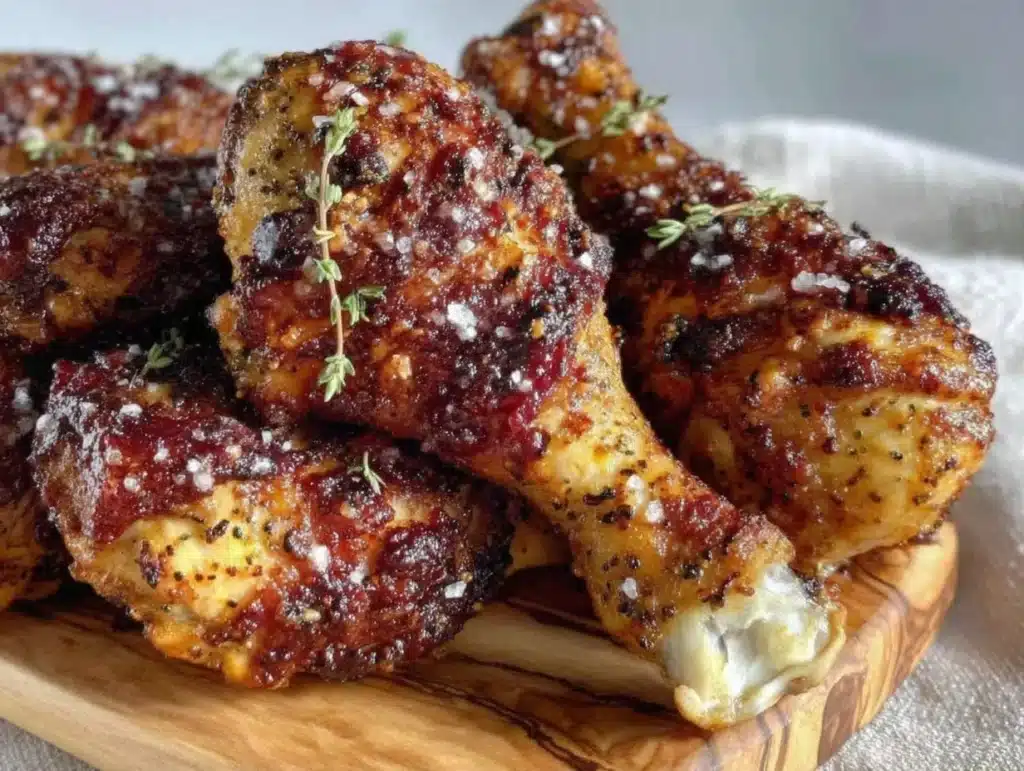
Let’s be honest for a second. I used to hate the smell of frying chicken. You know the one—that heavy, greasy scent that clings to your curtains for days and makes your kitchen feel like a grease trap. I avoided it like the plague. But then came that rainy Tuesday in November when I was tired, broke, and craving something crunchy without the guilt. I pulled out my air fryer, tossed in some drumsticks, and honestly? I didn’t believe my eyes. The skin wasn’t just cooked; it was shattered-glass crisp. The meat was juicy, not dry. It was the kind of meal that makes you forget about takeout entirely.
That moment changed everything for me. I wasn’t just making dinner; I was solving a problem. I needed a way to get that comfort food vibe without the hour of prep or the mess of a deep fryer. That’s how I fell in love with crispy air fryer chicken drumsticks. They are fast, they are forgiving, and they taste like you spent all day in the kitchen (even though you didn’t). Whether you are a busy parent trying to get dinner on the table before the kids melt down, or just someone who wants a high-protein snack that actually tastes good, this recipe is your new best friend.
I’ve tested this method over a dozen times. I’ve tried different spices, different temperatures, and even different air fryer brands. Some worked, some failed miserably. But this specific combination of technique and seasoning? It’s the gold standard. It’s reliable. It’s the kind of recipe you can make on autopilot when you’re exhausted, and it still comes out perfect every single time. No stress, no smoke alarm, just pure, crispy chicken heaven. If you’ve been on the fence about air frying, this is the recipe that will convert you. Trust me on this one.
Why You’ll Love This Recipe
Look, there are a million chicken recipes out there. So why this one? Why should you trust my version over the thousands of others? Well, let’s look at the facts. I’ve spent years in kitchens, both professional and home, and I know what makes a recipe stick. This isn’t just another quick fix; it’s a mastered technique. I’ve refined the coating process to ensure it stays on the meat, and I’ve dialed in the temperature to guarantee that juicy interior without burning the exterior. This is chef-tested, family-approved, and honestly, life-changing for weeknight dinners.
Here is why these drumsticks are going to become a staple in your rotation:
- Quick & Easy: You are looking at about 20 to 25 minutes of actual cooking time. That is it. Perfect for those nights when you walk in the door and realize you forgot to thaw something.
- Simple Ingredients: You don’t need a specialty grocery store trip. You likely have paprika, garlic powder, onion powder, and some oil in your pantry right now. It’s pantry-friendly cooking at its finest.
- Perfect for Meal Prep: These drumsticks reheat beautifully. Make a batch on Sunday, and you have high-protein lunches sorted for the whole week. No more sad desk salads.
- Crowd-Pleaser: Kids love the crunch. Adults love the convenience. It’s the rare dish that satisfies everyone at the table without compromise.
- Unbelievably Delicious: The texture is next-level. We are talking about that shattering crunch that gives way to tender, flavorful meat. It’s comfort food, but smarter.
What makes this different from the rest? It’s the double-dusting technique I use. Most people just toss the chicken in flour and spice. I use a specific ratio of cornstarch to flour, and I let it rest. This creates a micro-layer that crisps up better than anything else. It’s not just a recipe; it’s a hack. It’s the kind of cooking that makes you feel like you’ve unlocked a secret code. You close your eyes after the first bite, and you’re transported back to a Southern Sunday dinner, but without the guilt or the grease splatter. It’s soul-soothing satisfaction in a bite.
What Ingredients You Will Need
This recipe relies on simple, wholesome ingredients to deliver bold flavor and satisfying texture. The magic isn’t in expensive cuts of meat; it’s in the balance of spices and the right coating. I use staples that you probably already have, which makes this recipe incredibly accessible. The key is quality where it counts, like using fresh garlic instead of powder when you can, but I’ve also tested it with powder and it still works wonders.
- Chicken Drumsticks: Aim for about 2 to 2.5 pounds. I prefer skin-on, bone-in drumsticks because the skin renders down into that crispy layer we crave. Bone-in keeps the meat moist during the high heat.
- Buttermilk: This is crucial for tenderness. The acidity breaks down protein fibers. If you are dairy-free, you can use a plant-based milk mixed with a tablespoon of lemon juice or vinegar to create a buttermilk substitute.
- All-Purpose Flour: About 1 cup. This forms the base of the crust. I use standard bleached flour for a lighter texture.
- Cornstarch: 2 tablespoons. This is my secret weapon. It adds crispiness and helps the coating adhere better than flour alone. It creates that glass-like crunch.
- Smoked Paprika: 1 tablespoon. This gives you that smoky, BBQ-like flavor without needing a sauce. It adds a beautiful red hue, too.
- Garlic Powder: 1 teaspoon. For that savory backbone. I trust brands like McCormick for consistent potency.
- Onion Powder: 1 teaspoon. Adds sweetness and depth.
- Dried Thyme: 1 teaspoon. An earthy herb that pairs perfectly with chicken. Fresh thyme works too, but dried is more concentrated.
- Salt and Black Pepper: Generous amounts. Don’t be shy. Seasoning the coating is just as important as seasoning the meat.
- High Smoke-Point Oil: Avocado oil or light olive oil. You need an oil that won’t burn at 400°F (200°C). Avoid extra virgin olive oil here; it will smoke and taste bitter.
If you want to get fancy, you can add a pinch of cayenne for heat. I usually leave it mild for the kids, but I sprinkle extra chili flakes on my portion. The beauty of this ingredient list is its flexibility. You can swap the herbs for Italian seasoning if that’s what you have. It’s forgiving, which is exactly what you want in a weeknight meal.
Equipment Needed
You don’t need a lot of fancy gear to make this work, but having the right tools makes a huge difference in consistency. The star of the show is, obviously, your air fryer. I recommend a basket-style air fryer with a capacity of at least 5 quarts. If your basket is too small, you’ll have to cook in batches. Overcrowding is the enemy of crispiness; if the drumsticks are touching, they will steam instead of crisp. I’ve learned this the hard way after burning my fingers trying to squeeze eight drumsticks into a tiny 3-quart basket. Stick to a single layer.
You will also need a few large mixing bowls. One for the buttermilk bath and one for the dry coating. A whisk is helpful for combining the dry ingredients evenly so you don’t get a mouthful of pure salt. Tongs are essential for handling the hot chicken safely. I use long-handled metal tongs because they are durable and easy to clean. Finally, a wire rack that fits inside your air fryer basket is a nice optional upgrade. It allows air to circulate underneath the drumsticks, ensuring the bottom gets crispy too. If you don’t have one, just flip the drumsticks halfway through cooking.
If you don’t own an air fryer, you can adapt this for a conventional oven, but the texture won’t be quite the same. You’ll need a baking sheet lined with parchment paper or a wire rack. The cooking time will increase by about 10-15 minutes. But honestly? Once you try the air fryer method, you might never go back. It’s faster, more efficient, and uses less oil. It’s a great investment for any kitchen, especially if you are watching your budget on groceries.
Preparation Method
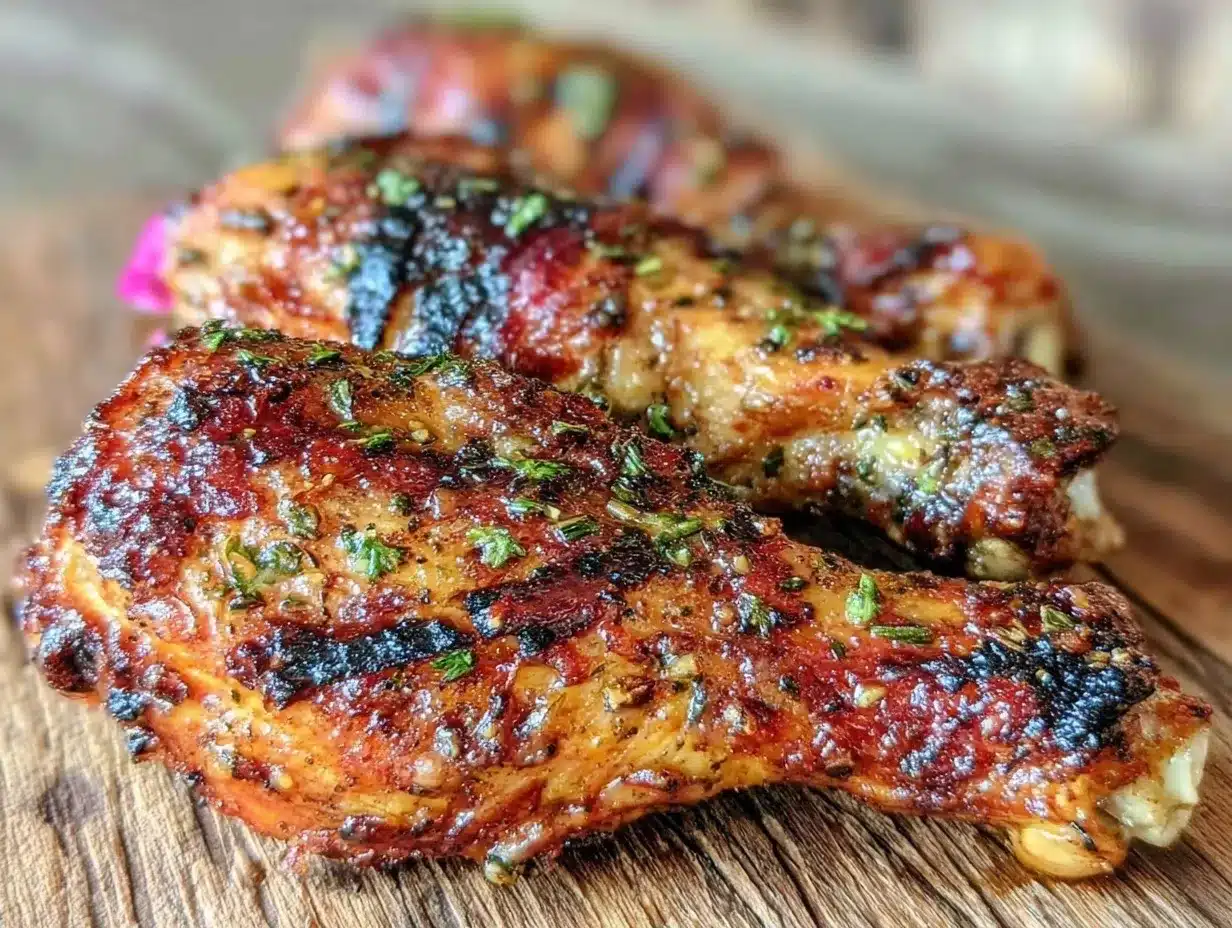
Let’s get into the nitty-gritty. This process is straightforward, but precision matters. Follow these steps closely for the best results.
Step 1: Prepare the Chicken (5 minutes)
First, pat the drumsticks completely dry with paper towels. This is non-negotiable. Moisture is the enemy of crispiness. If the skin is wet, the coating will slide off. Remove any loose skin or excess fat if you prefer a leaner result, but keep the main skin layer intact. Place the dried drumsticks into a large bowl.
Step 2: The Buttermilk Bath (10 minutes + marinating time)
Pour the buttermilk over the drumsticks. Toss them around to ensure every inch is coated. Cover the bowl with plastic wrap and refrigerate for at least 30 minutes, but ideally 2 hours. This step tenderizes the meat and helps the dry coating stick. If you are in a huge rush, 30 minutes works, but longer is better.
Step 3: Mix the Dry Coating (2 minutes)
In a separate shallow bowl or pie dish, whisk together the flour, cornstarch, smoked paprika, garlic powder, onion powder, thyme, salt, and pepper. Make sure the spices are evenly distributed. You want every bite to have that flavor profile.
Step 4: Dredge the Chicken (10 minutes)
Remove one drumstick from the buttermilk, letting the excess drip off for a second. Press it firmly into the flour mixture. Use your hands to pack the coating onto the chicken. Don’t just lightly dust it; press it. Turn it over and repeat. Make sure there are no bare spots. Place the coated drumstick on a clean plate or wire rack. Repeat with the rest. Let them sit for 5-10 minutes while your air fryer preheats. This helps the coating set.
Step 5: Preheat and Cook (20-25 minutes)
Preheat your air fryer to 400°F (200°C) for 3-5 minutes. This is a crucial step. Never skip the preheat. Once hot, place the drumsticks in the basket in a single layer. Do not overcrowd. Spray the tops lightly with avocado oil. This helps them brown. Cook for 12 minutes. Then, flip the drumsticks carefully. Spray the other side with oil. Cook for another 8-12 minutes, depending on the size of the drumsticks.
Step 6: Check for Doneness
Chicken is done when the internal temperature reaches 165°F (74°C) at the thickest part, avoiding the bone. The juices should run clear, and the skin should be deep golden brown and shatteringly crisp. If they aren’t crispy enough, give them another 2-3 minutes. Let them rest for 5 minutes before serving. This allows the juices to redistribute so they don’t run out when you bite in.
Cooking Tips & Techniques
After making this recipe dozens of times, I’ve picked up a few tricks that separate the good drumsticks from the great ones. First, always preheat your air fryer. It sounds basic, but it creates an immediate shock of heat that seals the crust. If you put cold chicken into a cold basket, it will steam and get soggy. Second, don’t skip the oil spray. Even though it’s an air fryer, a light mist of oil helps the Maillard reaction happen, giving you that golden-brown color. Without it, they might look pale and boiled.
I also learned the hard way that flipping is key. Air fryers heat from the top down mostly. Flipping halfway ensures even browning. If you have a larger air fryer with a fan that circulates well, you might get away with not flipping, but for most models, flip them. Another common mistake is overcrowding the basket. Air needs to circulate. If the drumsticks are touching, the touching sides will be soft and rubbery. Cook in batches if you have to. It’s worth the extra ten minutes.
For consistency, try to use drumsticks of similar size. If you have huge ones and tiny ones, cook the big ones first or start them earlier. A meat thermometer is your best friend here. Guessing doneness leads to dry chicken. Pull them at 165°F. And finally, let them rest. I know it’s tempting to dig in immediately, but resting for 5 minutes keeps the meat juicy. It’s a small step that makes a big difference in texture.
Variations & Adaptations
One of the best things about this base recipe is how adaptable it is. You can tweak it to fit your dietary needs or flavor preferences easily. For a gluten-free version, simply swap the all-purpose flour for a 1:1 gluten-free baking flour or use almond flour. Almond flour browns faster, so keep an eye on them. You might need to lower the temperature by 10°F to prevent burning.
If you are looking for a spicy kick, add cayenne pepper, crushed red pepper flakes, or a dash of hot sauce to the buttermilk. I love a “Nashville Hot” style variation where I brush the cooked drumsticks with a mixture of hot oil and cayenne after they come out of the fryer. It’s fiery and delicious. For a healthier low-carb option, you can skip the flour and cornstarch entirely and use crushed pork rinds or parmesan cheese as the coating. It adds a fantastic crunch and extra protein.
Seasoning-wise, you can go global. Try using curry powder and cumin for an Indian-inspired twist. Or swap the herbs for Italian seasoning and add some grated Parmesan to the flour mix for a cheesy crust. I once made a honey-garlic version by brushing the cooked drumsticks with a mix of honey and minced garlic while they were still hot. The sweetness balanced the saltiness perfectly. Get creative. The base technique works with almost any spice blend.
Serving & Storage Suggestions
These drumsticks are fantastic on their own, but they shine when paired with the right sides. I love serving them with a cold, creamy coleslaw to cut through the richness. Roasted vegetables like broccoli or asparagus are also great options. For a carb-heavy meal, mashed potatoes or corn on the cob are perfect companions. A cold beer or a sparkling lemonade pairs well too, especially if you went with the spicy variation.
For storage, let the chicken cool completely before placing it in an airtight container. They will last in the refrigerator for up to 4 days. To reheat, do not use the microwave; it will make the skin soggy. Instead, pop them back in the air fryer at 350°F for 3-4 minutes. This restores the crispiness perfectly. You can also freeze them. Cook them fully, let them cool, and freeze in a freezer-safe bag for up to 3 months. Reheat from frozen in the air fryer at 375°F for about 10-12 minutes.
The flavors actually develop overnight. The spices have time to penetrate the meat further. So, if you meal prep these, they often taste even better on day two than they do fresh out of the fryer. Just make sure to reheat them properly to maintain that texture.
Nutritional Information & Benefits
Chicken drumsticks are a great source of high-quality protein, which is essential for muscle repair and satiety. They contain all the essential amino acids your body needs. A single drumstick (skin-on) has roughly 130-150 calories, depending on size. The skin adds fat, which helps with flavor and nutrient absorption, but if you want to reduce calories, you can remove the skin before eating. The recipe uses minimal oil, so the fat content is moderate. They are also rich in selenium and zinc, which support immune function. This is a nutrient-dense meal that keeps you full for hours, making it a smart choice for weight management or active lifestyles.
Conclusion
Crispy air fryer chicken drumsticks are more than just a meal; they are a solution to the daily dinner dilemma. They are fast, flavorful, and incredibly satisfying. I hope this recipe brings you the same joy it brought me on that rainy Tuesday. Don’t be afraid to experiment with spices and sides. Make it your own. I’d love to hear how you customize this recipe. Did you add extra heat? Did you serve it with something unexpected? Drop a comment below and let me know. Share this with a friend who needs a quick dinner idea. Happy cooking, and enjoy every crunchy bite.
FAQs
Can I use chicken thighs instead of drumsticks?
Yes, you can use bone-in, skin-on chicken thighs. Just note that thighs are larger and may take 2-5 minutes longer to cook. Always check the internal temperature.
Why is my chicken not crispy?
This usually happens if the basket was overcrowded, the chicken wasn’t patted dry, or the air fryer wasn’t preheated. Ensure you have space between pieces and spray with oil.
Do I need to flip the drumsticks?
Yes, flipping them halfway through cooking ensures even browning and crispiness on all sides.
Can I cook these from frozen?
It’s best to thaw them first for even cooking. If cooking from frozen, add 5-10 minutes to the cook time and ensure the internal temperature reaches 165°F.
What is the best oil to use for air frying?
Use oils with a high smoke point like avocado oil, light olive oil, or canola oil. Avoid butter or extra virgin olive oil as they can burn at high temperatures.
Pin This Recipe!
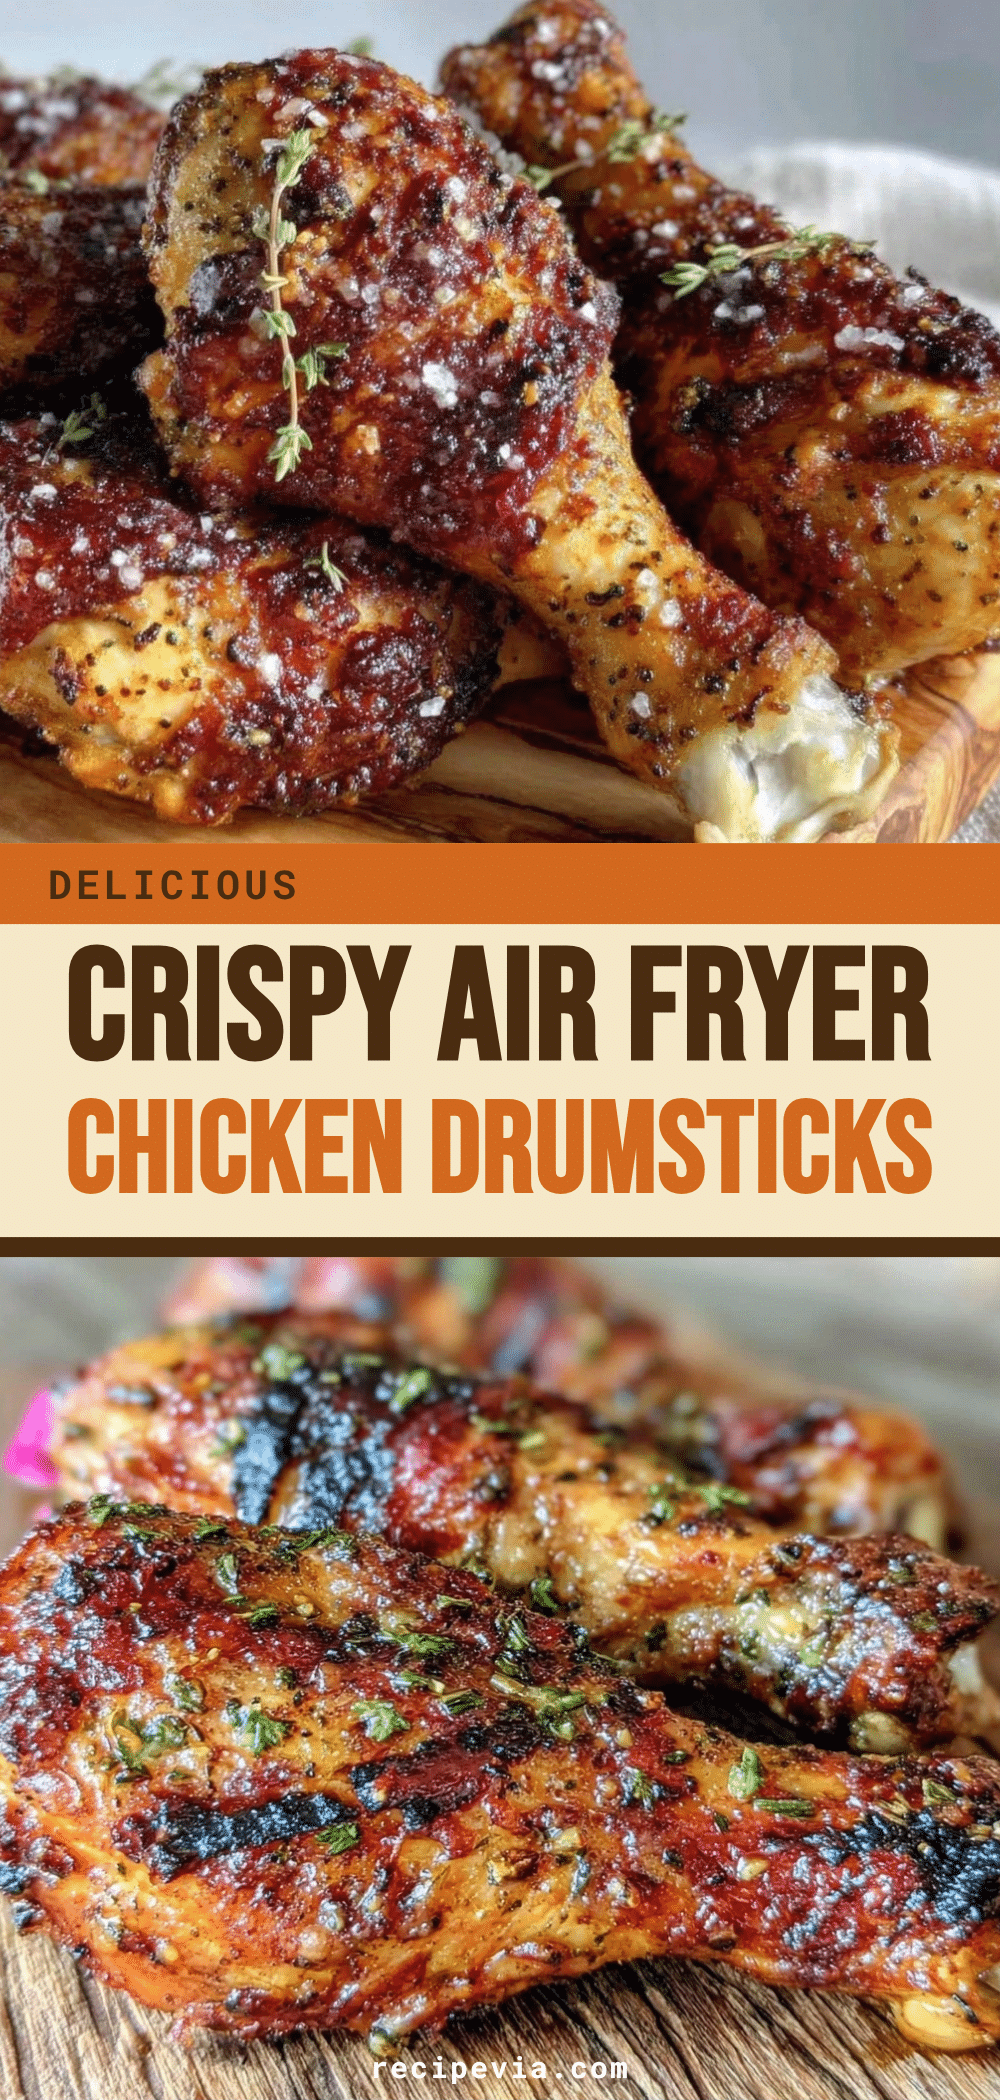

Crispy Air Fryer Chicken Drumsticks: 20 Min Easy Dinner
- Total Time: 45 minutes
- Yield: 4 servings 1x
Description
Achieve shattered-glass crisp skin and juicy meat with this easy air fryer chicken drumstick recipe. Using a double-dusting technique with cornstarch and buttermilk, this high-protein meal is ready in under 30 minutes with minimal oil.
Ingredients
- 2 to 2.5 pounds chicken drumsticks (skin-on, bone-in)
- 1 cup all-purpose flour
- 2 tablespoons cornstarch
- 1 tablespoon smoked paprika
- 1 teaspoon garlic powder
- 1 teaspoon onion powder
- 1 teaspoon dried thyme
- Salt and black pepper (generous amounts)
- Buttermilk (enough to coat drumsticks)
- High smoke-point oil (avocado oil or light olive oil) for spraying
Instructions
- Pat the chicken drumsticks completely dry with paper towels to ensure crispiness.
- Place drumsticks in a bowl and pour buttermilk over them, tossing to coat. Cover and refrigerate for at least 30 minutes (ideally 2 hours).
- In a shallow bowl, whisk together flour, cornstarch, smoked paprika, garlic powder, onion powder, thyme, salt, and pepper.
- Remove a drumstick from the buttermilk, letting excess drip off, then press firmly into the flour mixture to pack the coating. Place on a plate or rack.
- Repeat with remaining drumsticks and let them sit for 5-10 minutes to set the coating.
- Preheat air fryer to 400°F (200°C) for 3-5 minutes.
- Place drumsticks in the air fryer basket in a single layer without overcrowding. Spray tops lightly with oil.
- Cook for 12 minutes, then flip drumsticks and spray the other side with oil.
- Cook for another 8-12 minutes until internal temperature reaches 165°F (74°C) and skin is golden brown.
- Let drumsticks rest for 5 minutes before serving to redistribute juices.
Notes
Do not overcrowd the air fryer basket; cook in batches if necessary. Ensure the chicken is patted dry before coating. Preheating the air fryer is crucial for crispiness. For a gluten-free version, substitute all-purpose flour with a 1:1 gluten-free baking flour or almond flour. For spicy variations, add cayenne pepper or red pepper flakes to the coating or buttermilk.
- Prep Time: 15 minutes
- Cook Time: 20-25 minutes
- Category: Main Course
- Cuisine: American
Nutrition
- Serving Size: 1-2 drumsticks per s
- Calories: 150
- Sodium: 300
- Fat: 8
- Saturated Fat: 2
- Carbohydrates: 10
- Fiber: 0.5
- Protein: 12
Keywords: air fryer chicken, crispy chicken drumsticks, easy dinner, high protein, meal prep, gluten-free option, healthy cooking