Let’s be honest for a second. Grocery prices are no joke. You walk into the store, grab a bag of mozzarella sticks, and the price tag makes you want to put them back on the shelf. It’s a classic moment of “I want this, but my wallet says no.” That was me last Friday, standing in the frozen aisle, feeling that familiar pinch of budget stress.
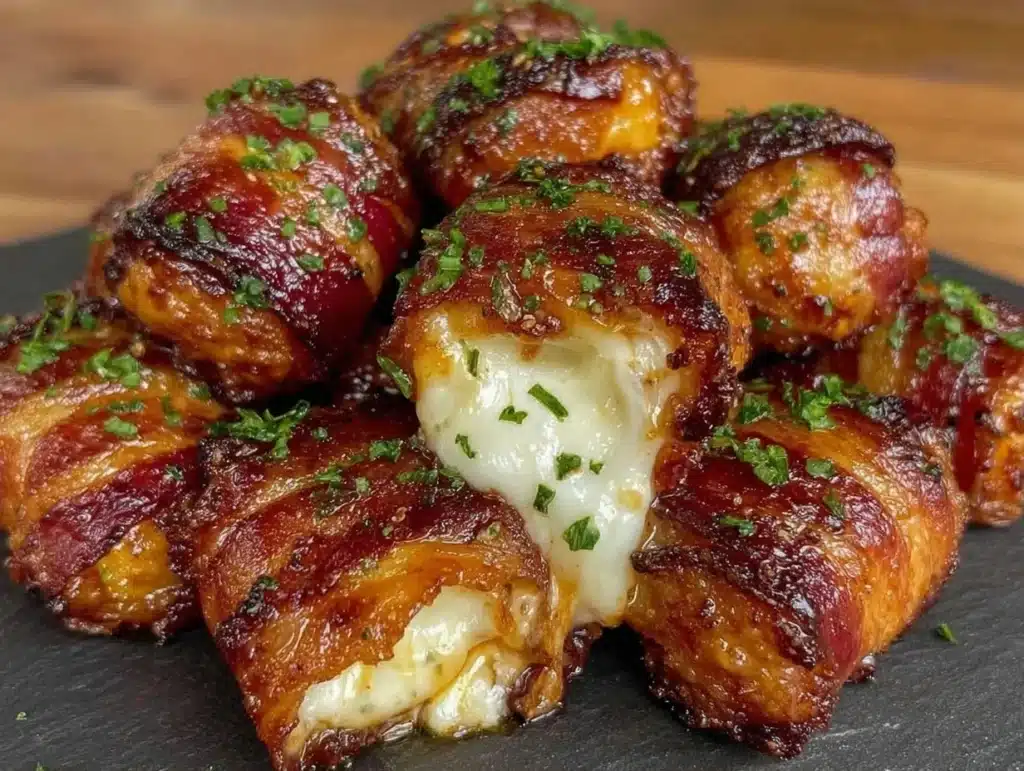
But here’s the thing about being a savvy home cook: you don’t give up on comfort food. You just get creative. I decided to stretch a single bag of frozen mozzarella sticks into a full meal by adding two humble pantry staples: bacon and a little extra cheese. The result? Cheesy Bacon Mozzarella Sticks that are richer, crunchier, and infinitely more satisfying than the store-bought version.
I’ve tested this hack over a dozen times now. Sometimes I use thick-cut bacon, sometimes thin. Sometimes I double the cheese. Every time, the result is the same: my family thinks I went to the trouble of making them from scratch. Nobody can tell it’s a budget-friendly stretch. Honestly, it’s the best kind of win. You get the indulgence of a restaurant appetizer without the restaurant price tag. Let’s face it, we all need a little win in our week.
This recipe isn’t just about saving money, though that’s a huge bonus. It’s about maximizing flavor with minimal effort. The salty crunch of the bacon pairs perfectly with the gooey, stretchy mozzarella. It’s the kind of snack that pulls you into the kitchen at 8 PM when you’re trying to avoid cooking dinner. I remember the first time I made these, I had to hide them in the fridge because my kids would have eaten the whole batch before I could take a photo. If you’re looking for a quick, high-protein snack or a game-day appetizer that doesn’t break the bank, this is it.
As someone who has spent years figuring out how to make a dollar stretch further at the table, I’ve learned that the best meals are often the simplest ones. You don’t need fancy ingredients to make something delicious. You just need a little bit of ingenuity. These cheesy bacon mozzarella sticks are proof that you can have your cake and eat it too—literally.
Why You’ll Love This Recipe
There are a lot of mozzarella stick recipes out there. Some are complicated, requiring multiple dredging stations and specific types of breadcrumbs. Others are just plain boring. This version is different because it’s built on the principle of “more is more,” but in a smart way. It’s not just about adding extra cheese; it’s about adding layers of flavor that make the dish feel premium, even though the ingredients are basic.
Here is why this specific combination works so well for your wallet and your taste buds:
- Quick & Easy: This comes together in under 20 minutes. If you have frozen mozzarella sticks on hand, you’re looking at 15 minutes of active time. Perfect for busy weeknights or when you have unexpected guests.
- Simple Ingredients: You likely already have everything in your kitchen. Mozzarella sticks, bacon, and maybe some extra cheese. No fancy grocery trips needed. This is the definition of a pantry-staple meal.
- Perfect for Game Day: Whether it’s Sunday football or a casual Friday night in, these are the ultimate crowd-pleaser. They are easy to eat, easy to share, and hard to resist.
- Crowd-Pleaser: Kids love the cheese. Adults love the bacon. It’s a win-win. I’ve served these at potlucks, and they always disappear first. People ask for the recipe, and when I tell them it’s just a hack, they are always surprised.
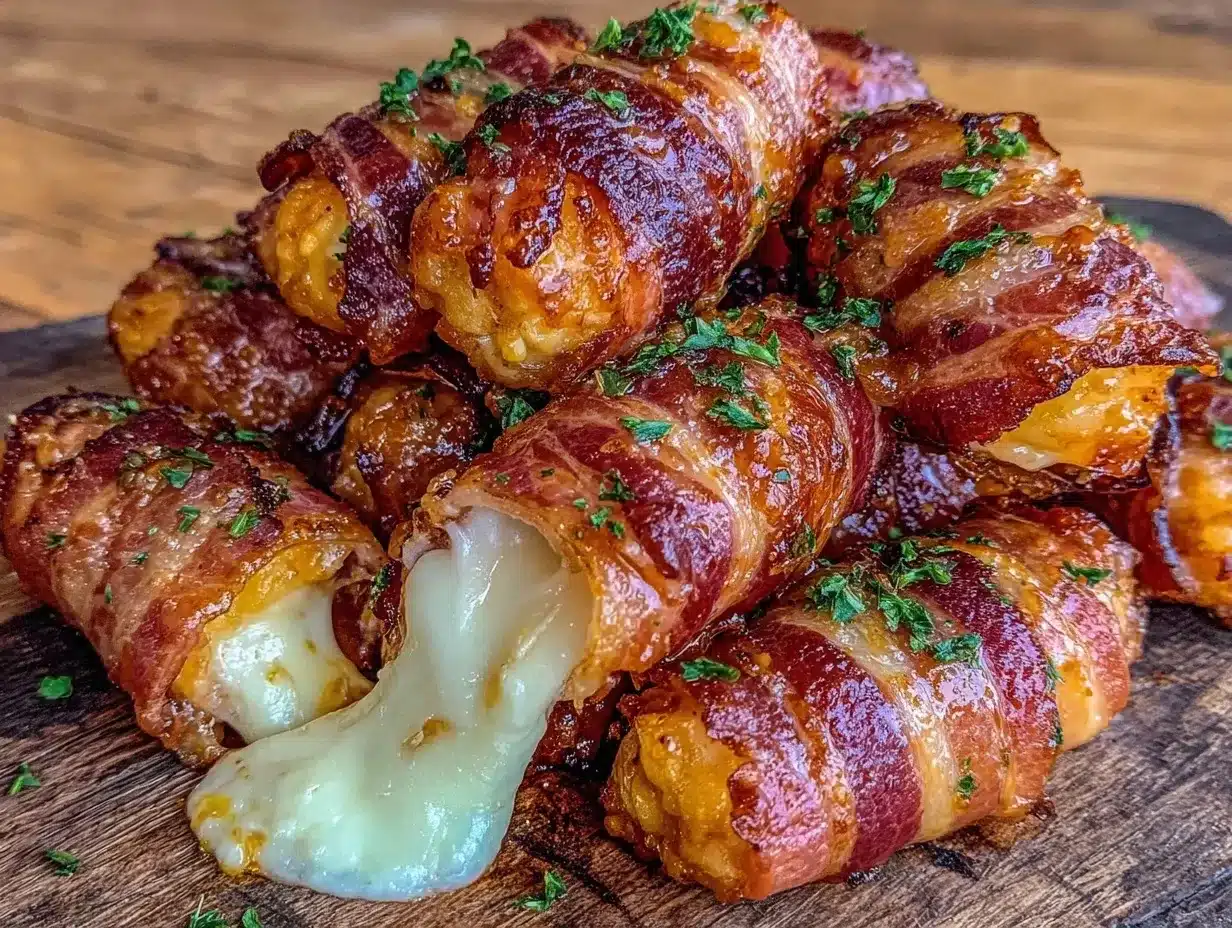
- Unbelievably Delicious: The texture combo is next-level. You get the crispiness of the fried coating, the snap of the bacon, and the molten center of the mozzarella. It’s comfort food reimagined—faster, cheaper, but with the same soul-soothing satisfaction.
What makes this recipe stand out from the rest is the technique. Most people just fry the sticks. I add a step that changes everything: wrapping the bacon around the stick before frying. This creates a barrier that keeps the cheese inside while adding a savory, smoky crunch on the outside. It’s a small change, but it makes a huge difference. It’s not just another version; it’s my best version.
This recipe isn’t just good—it’s the kind that makes you close your eyes after the first bite. It’s a reminder that you don’t need to spend a lot to eat well. It’s perfect for impressing guests without stress, or turning a simple snack into something memorable. Plus, it stretches your grocery budget significantly. You’re getting more servings for less money, and nobody is the wiser.
What Ingredients You Will Need
This recipe uses simple, wholesome ingredients to deliver bold flavor and satisfying texture without the fuss. The beauty of this hack is that it relies on ingredients you probably already have or can pick up on your way home from work. We are focusing on quality over quantity here, but in a way that maximizes volume and taste.
- Frozen Mozzarella Sticks (12 count): Look for a brand that has a good cheese-to-breading ratio. I recommend Mezzetta or Tyson for consistent results. Avoid the cheapest brands, as they sometimes have a waxy texture. (This is your base, so don’t skimp too much.)
- Thick-Cut Bacon (6-8 slices): Thick-cut bacon holds up better during frying than thin bacon. It provides a sturdy wrapper and a meaty crunch. If you’re on a tight budget, you can use regular bacon, but you’ll need to use more slices to get the same effect. (Adds richness and saltiness.)
- Shredded Mozzarella Cheese (1 cup): We’re adding extra cheese inside the bacon wrap for that ultimate gooey center. Use pre-shredded cheese for convenience, or block cheese and shred it yourself. Block cheese melts better and has less anti-caking agents. (Use low-moisture mozzarella for best texture.)
- Eggs (2 large): These act as the glue for the breading. Room temperature eggs work best because they bind more effectively. (Essential for the crust.)
- Panko Breadcrumbs (1.5 cups): Panko is key here. It’s lighter and crunchier than regular breadcrumbs. If you can’t find Panko, regular breadcrumbs work, but the texture won’t be as light. (Look for “Japanese-style” breadcrumbs if your store has them.)
- Italian Seasoning (1 tsp): A little bit of dried oregano, basil, and thyme adds depth to the breading. It makes the simple breading taste more like a restaurant appetizer. (Optional, but recommended.)
- Garlic Powder (1 tsp): Just a pinch goes a long way. It complements the bacon and cheese perfectly. (Adds savory depth.)
- Salt and Black Pepper (to taste): Season your breading lightly. The bacon and cheese are already salty, so don’t overdo it. (Balance the flavors.)
- Oil for Frying (1 cup): Use a neutral oil with a high smoke point, like vegetable oil, canola oil, or peanut oil. Avoid olive oil, as it has a lower smoke point and a strong flavor that doesn’t pair well here. (For frying, not for cooking.)
For seasonal variations, you can swap the Italian seasoning for Cajun seasoning if you want a spicy kick. In the summer, serve these with a fresh tomato basil sauce instead of the usual marinara. It’s a nice twist that feels light and fresh. Also, if you’re watching your carb intake, you can use almond flour instead of Panko, though the texture will be different. For a gluten-free option, use certified gluten-free Panko. These substitutions make the recipe adaptable to almost any diet without losing the core appeal.
Equipment Needed
You don’t need a fancy kitchen to make these. In fact, keeping it simple is part of the charm. Here is what you’ll need to get the job done.
- Deep Frying Pan or Dutch Oven: A heavy-bottomed pot is ideal because it holds heat well. If you don’t have one, a deep skillet works too. Just make sure it’s deep enough to prevent oil splatter.
- Candy Thermometer: This is crucial for getting the oil temperature right. You want the oil to be around 350°F (175°C). If you don’t have a thermometer, you can test it by dropping a breadcrumb into the oil. If it sizzles and rises to the top immediately, the oil is ready.
- Three Shallow Bowls: You’ll need one for the beaten eggs, one for the Panko mixture, and one for the bacon-wrapped sticks. This is your assembly line.
- Paper Towels: Line a plate with paper towels to drain the finished sticks. This helps absorb excess oil and keeps them crispy.
- Tongs: Use long tongs to handle the sticks in the hot oil. It’s safer and gives you better control than a fork.
If you don’t want to deep fry, you can use an air fryer. It’s a great alternative for a healthier version. You’ll need to spray the sticks with oil before cooking to help them brown. The cooking time will be slightly longer, and you’ll need to shake the basket halfway through. For a budget-friendly tip, reuse your frying oil if it’s still clean. Let it cool, strain it through a coffee filter, and store it in a jar. It can be used 2-3 more times for frying.
Preparation Method
Getting these right is all about timing and temperature. Here is the step-by-step process to ensure you get that perfect crunch and gooey center.
- Prep Your Station (5 minutes): Set up your three bowls. Crack the eggs into the first bowl and whisk them until smooth. In the second bowl, combine the Panko breadcrumbs, Italian seasoning, garlic powder, salt, and pepper. Mix well. This is your dry coating. (Make sure the ingredients are evenly distributed.)
- Prepare the Bacon (2 minutes): Take your bacon slices and cut them in half crosswise. You want strips that are long enough to wrap around the mozzarella stick with a little overlap. If your bacon is very thick, you might only need half a slice per stick. (Trim any excess fat if you prefer a leaner result.)
- Wrap the Sticks (5 minutes): Take a frozen mozzarella stick and wrap a piece of bacon around it. The bacon should cover about 75% of the stick. Overlap the ends slightly. If the bacon is loose, you can secure it with a toothpick, but try to avoid toothpicks if possible for a smoother texture. (Work quickly, as the cheese will start to soften.)
- Double Dredge (5 minutes): This is the secret to a crispy crust. Dip the bacon-wrapped stick into the egg wash, making sure it’s fully coated. Then, roll it in the Panko mixture, pressing gently to help the crumbs adhere. Dip it back into the egg wash, then roll it in the Panko again. This double coating creates a thick, protective shell that prevents the cheese from leaking out. (Don’t skip the second dip!)
- Freeze Again (10 minutes): Place the coated sticks on a baking sheet and put them in the freezer for at least 10 minutes. This step is non-negotiable. It re-solidifies the cheese, ensuring it doesn’t melt out before the crust is golden brown. (You can leave them in the freezer for up to an hour if you’re prepping ahead.)
- Heat the Oil (10 minutes): Pour about 1 inch of oil into your deep pan or Dutch oven. Heat it over medium-high heat until it reaches 350°F (175°C). Use your thermometer to check. If you don’t have one, wait until the oil shimmers slightly and a breadcrumb sizzles vigorously when dropped in.
- Fry the Sticks (2-3 minutes per batch): Carefully lower 2-3 sticks into the hot oil using tongs. Do not overcrowd the pan. Fry for 2-3 minutes, turning occasionally, until the bacon is crispy and golden brown. The oil temperature will drop when you add the sticks, so keep an eye on it. If the oil drops below 325°F, the sticks will absorb too much oil. If it goes above 375°F, the bacon will burn before the cheese melts.
- Drain and Serve (2 minutes): Remove the sticks from the oil and place them on the paper towel-lined plate. Let them drain for a minute. Remove any toothpicks. Serve immediately with marinara sauce for dipping. (They are best eaten hot and fresh.)
If the bacon starts to unroll while frying, just use your tongs to press it back into place. If you notice the cheese leaking out, it means the sticks weren’t frozen long enough before frying. Next time, give them an extra 5 minutes in the freezer. Also, if you’re frying in batches, keep the finished sticks warm in a 200°F oven on a wire rack.
Cooking Tips & Techniques
Having cooked these many times, I’ve learned a few tricks that save time and improve results. The biggest mistake people make is rushing the freezing step. I’ve had cheese explosions in my oil before, and let me tell you, cleaning that up is not fun. So, please, respect the freeze.
Another tip is to use a mix of Panko and regular breadcrumbs. Pure Panko can sometimes fall off if not handled gently. Mixing them 50/50 gives you the crunch of Panko with the adhesion of regular crumbs. It’s a subtle change, but it makes the crust stay on better.
Timing is everything. Bacon cooks faster than cheese melts. That’s why the double coating and freezing are so important. They create a buffer. If you find your bacon is getting too dark before the cheese is hot, lower the heat of the oil slightly. It’s better to fry slowly and evenly than to burn the outside.
Also, don’t skip the seasoning in the Panko. Plain breadcrumbs are boring. The garlic and Italian herbs make a world of difference. I also like to add a pinch of red pepper flakes for a little heat. It cuts through the richness of the cheese and bacon.
When frying, listen to the oil. It should have a steady, gentle sizzle. If it’s screaming, the heat is too high. If it’s barely whispering, the heat is too low. You want that medium-low rumble. And always, always use tongs. Forks can puncture the coating, letting the cheese escape.
Variations & Adaptations
While the classic version is amazing, there are plenty of ways to tweak this recipe to suit your taste or dietary needs.
- Spicy Jalapeño Version: Slice a fresh jalapeño into thin rounds and place one on the mozzarella stick before wrapping it in bacon. The heat pairs beautifully with the salty bacon.
- Herb-Crusted Option: Swap the Italian seasoning for a blend of dried rosemary and thyme. This gives a more earthy, rustic flavor profile that goes well with a balsamic dipping sauce.
- Chicken Bacon Version: For a lighter protein option, use chicken bacon instead of pork bacon. It’s leaner and has a milder flavor. You might need to add a little more salt to the breading to compensate.
- Baked Version: If you want to avoid frying, place the coated sticks on a wire rack over a baking sheet. Spray them generously with cooking spray. Bake at 400°F (200°C) for 15-20 minutes, flipping halfway through. They won’t be as crispy as fried, but they are much healthier.
- Gluten-Free: Use gluten-free Panko breadcrumbs. They have improved significantly in recent years and work just as well as regular Panko. Just be sure to check that your mozzarella sticks are also gluten-free, as some brands use wheat flour in the coating.
I’ve also tried wrapping the bacon around a block of cream cheese instead of mozzarella sticks. It’s a different texture, but still delicious. It’s great for a low-carb crowd if you skip the breading and just fry the bacon-wrapped cream cheese. It’s a fun variation to try when you want something different.
Serving & Storage Suggestions
These sticks are best served immediately while they are hot and gooey. I recommend serving them with a classic marinara sauce, but don’t stop there. A garlic aioli or a spicy ranch dip works wonders. For a more sophisticated touch, serve with a balsamic glaze drizzle.
If you have leftovers (which is rare), you can store them in an airtight container in the refrigerator for up to 2 days. To reheat, use an air fryer or a toaster oven. Microwaving will make the bacon soggy, so avoid that method. Reheat at 350°F (175°C) for 5-7 minutes until warmed through.
You can also freeze the uncooked, coated sticks. Place them on a baking sheet and freeze until solid, then transfer to a freezer bag. They can be stored for up to 3 months. When you want to eat them, fry them directly from frozen, adding an extra minute or two to the cooking time. This is great for meal prep. You can make a big batch on Sunday and have snacks ready for the week.
The flavors actually meld well after a day in the fridge, making them slightly richer. But nothing beats the fresh-out-of-the-oil experience. The contrast between the crispy bacon and the molten cheese is what makes this dish special.
Nutritional Information & Benefits
While these are definitely an indulgent treat, they do offer some nutritional benefits. Bacon is a good source of protein, and mozzarella cheese provides calcium and more protein. The double coating adds carbohydrates, so portion control is key.
Each stick (depending on size) has approximately 150-200 calories. If you use chicken bacon, you can reduce the fat content significantly. For a low-carb option, skip the Panko breading and just fry the bacon-wrapped cheese. It’s keto-friendly and very satisfying.
These are not a daily health food, but they are a great way to satisfy a craving without ordering expensive takeout. They are also a good source of saturated fat, which can be part of a balanced diet in moderation. I try to balance these with a side of vegetables or a salad when I serve them as a main dish.
For those with dietary restrictions, be mindful of the sodium content in both the bacon and the cheese. If you are watching your salt intake, look for low-sodium bacon and rinse it before cooking. It helps reduce the saltiness without losing the flavor.
Conclusion
Making Cheesy Bacon Mozzarella Sticks is one of those simple hacks that pays off in a big way. It’s a recipe that stretches your dollar, satisfies your cravings, and impresses everyone who tries it. You don’t need fancy ingredients or advanced skills to make them. You just need a little bit of patience and a willingness to experiment.
I love this recipe because it reminds me that good food doesn’t have to be complicated or expensive. It’s about making the most of what you have and creating something delicious in the process. Whether you’re feeding a crowd or just treating yourself to a late-night snack, these sticks are a winner.
So, next time you’re in the frozen aisle, don’t just grab the bag. Add some bacon and cheese, and see what happens. You might just discover your new favorite recipe. I’d love to hear how you make them. Do you add extra spice? Do you use a different dipping sauce? Share your variations in the comments below. And if you make them, tag me on social media. I always love seeing your creations. Happy cooking!
Frequently Asked Questions
Can I use thin-cut bacon?
Yes, you can use thin-cut bacon, but you may need to use two strips per stick to ensure they wrap around completely. Thin bacon cooks faster, so keep a close eye on the frying time to prevent burning.
Why did my cheese leak out?
This usually happens if the sticks weren’t frozen long enough before frying, or if the oil temperature was too low. Make sure to freeze the coated sticks for at least 10 minutes to re-solidify the cheese.
Can I bake these instead of frying?
Absolutely. Preheat your oven to 400°F (200°C). Place the coated sticks on a wire rack and spray them lightly with oil. Bake for 15-20 minutes, flipping halfway through, until the bacon is crispy.
How do I store leftovers?
Store leftovers in an airtight container in the refrigerator for up to 2 days. Reheat in an air fryer or toaster oven to maintain crispiness. Avoid the microwave, as it will make the bacon soggy.
Can I freeze the uncooked sticks?
Yes, this is a great meal prep option. Freeze the coated, uncooked sticks on a baking sheet until solid, then transfer to a freezer bag. They can be stored for up to 3 months. Fry directly from frozen, adding 1-2 minutes to the cooking time.
Pin This Recipe!
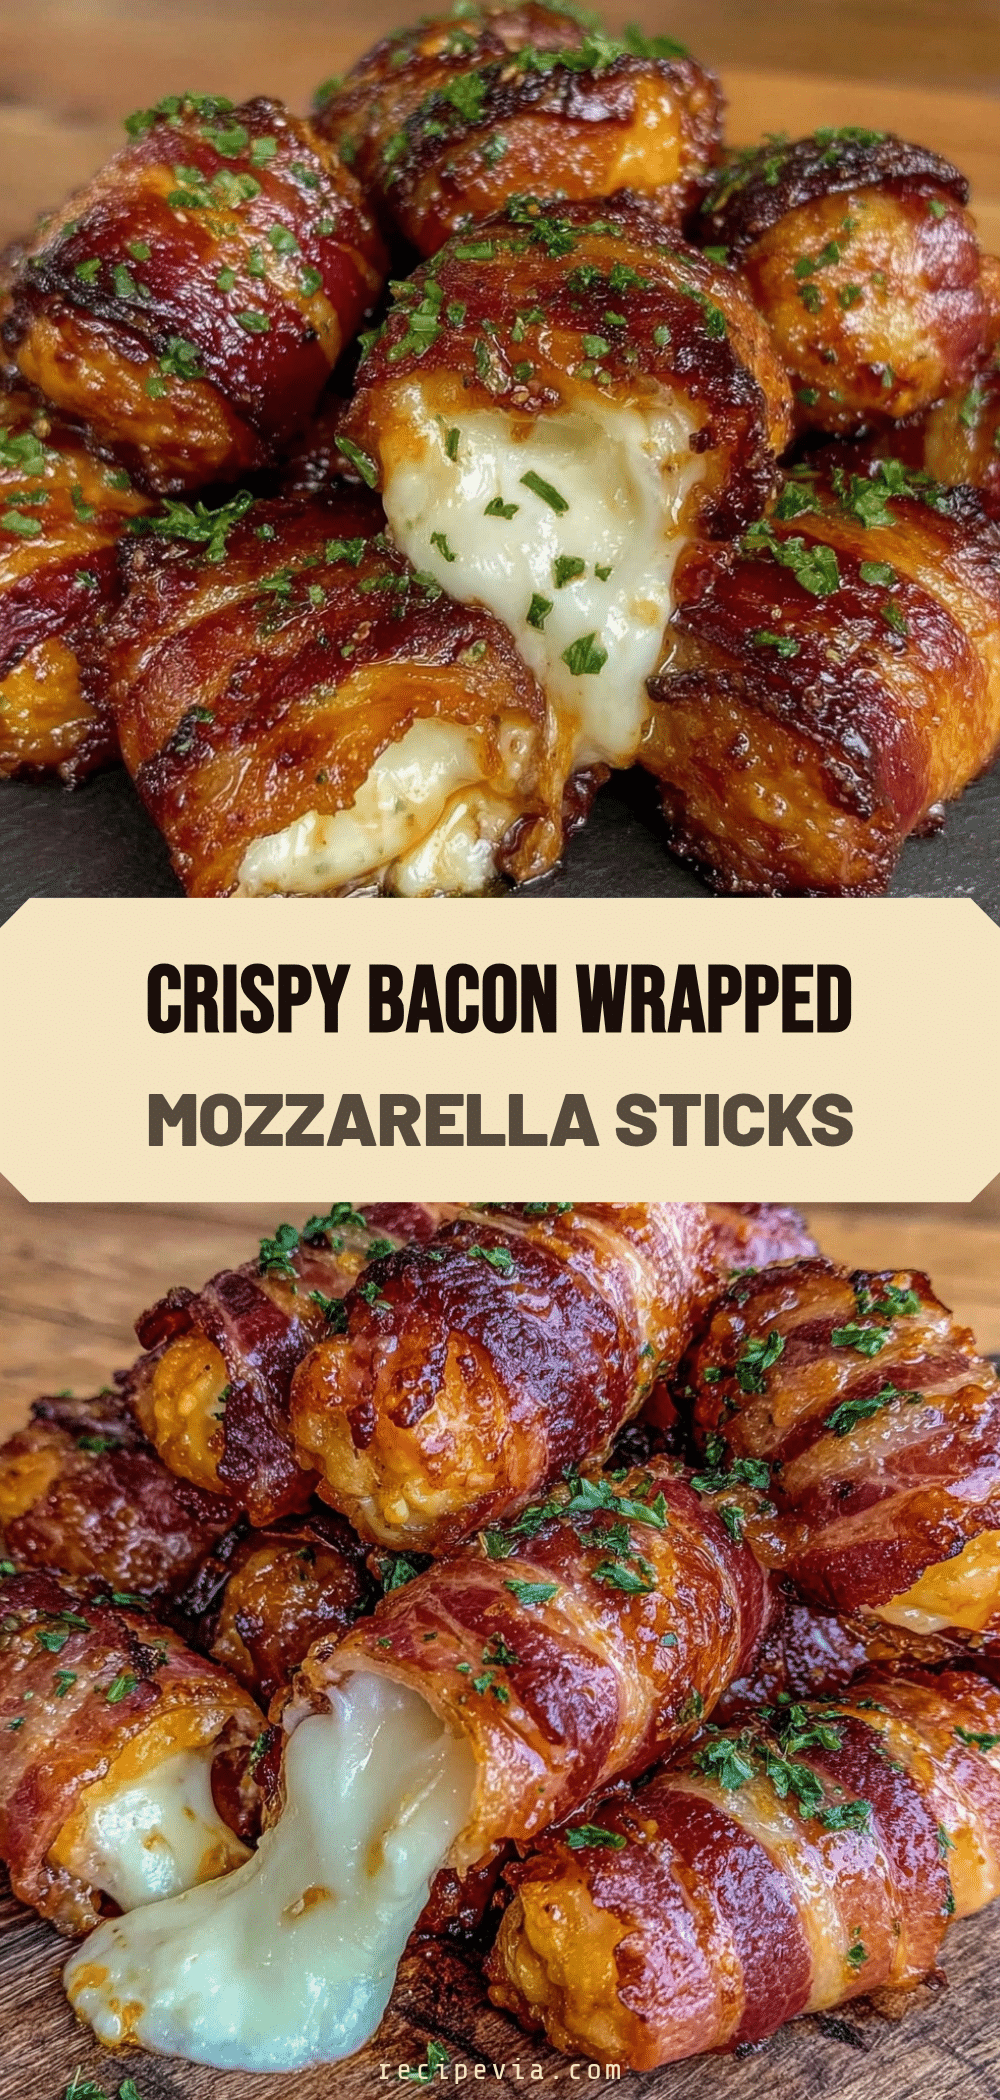

Cheesy Bacon Mozzarella Sticks: Easy 3-Ingredient Stretch Hack
- Total Time: 25 minutes
- Yield: 12 servings 1x
Description
A budget-friendly, high-protein snack that stretches frozen mozzarella sticks with bacon and extra cheese for a richer, crunchier, and more satisfying appetizer.
Ingredients
- 12 frozen mozzarella sticks
- 6–8 slices thick-cut bacon
- 1 cup shredded low-moisture mozzarella cheese
- 2 large eggs
- 1.5 cups Panko breadcrumbs
- 1 tsp Italian seasoning
- 1 tsp garlic powder
- Salt and black pepper to taste
- 1 cup neutral oil for frying (vegetable, canola, or peanut oil)
Instructions
- Set up three shallow bowls: one with whisked eggs, one with Panko mixed with Italian seasoning, garlic powder, salt, and pepper, and one for assembly.
- Cut bacon slices in half crosswise to create strips long enough to wrap around the mozzarella sticks.
- Wrap a piece of bacon around each frozen mozzarella stick, covering about 75% of the stick and overlapping the ends slightly.
- Double dredge the bacon-wrapped sticks: dip in egg wash, roll in Panko mixture, dip back in egg wash, and roll in Panko again to create a thick protective shell.
- Place coated sticks on a baking sheet and freeze for at least 10 minutes to re-solidify the cheese.
- Heat oil in a deep frying pan or Dutch oven to 350°F (175°C).
- Fry 2-3 sticks at a time in hot oil for 2-3 minutes, turning occasionally, until bacon is crispy and golden brown.
- Remove sticks from oil and drain on paper towels. Serve immediately with marinara sauce.
Notes
Ensure sticks are frozen for at least 10 minutes before frying to prevent cheese leakage. If oil temperature drops below 325°F, sticks may absorb too much oil. If above 375°F, bacon may burn. For a healthier option, bake at 400°F for 15-20 minutes, flipping halfway. Leftovers can be stored in the fridge for 2 days and reheated in an air fryer or toaster oven.
- Prep Time: 15 minutes
- Cook Time: 10 minutes
- Category: Appetizer
- Cuisine: American
Nutrition
- Serving Size: 1 mozzarella stick
- Calories: 175
- Sugar: 1
- Sodium: 450
- Fat: 12
- Saturated Fat: 5
- Carbohydrates: 10
- Fiber: 0.5
- Protein: 8
Keywords: mozzarella sticks, bacon, budget recipe, game day food, appetizer, frozen food hack, easy snack, high protein