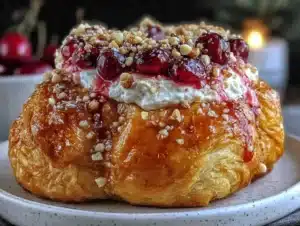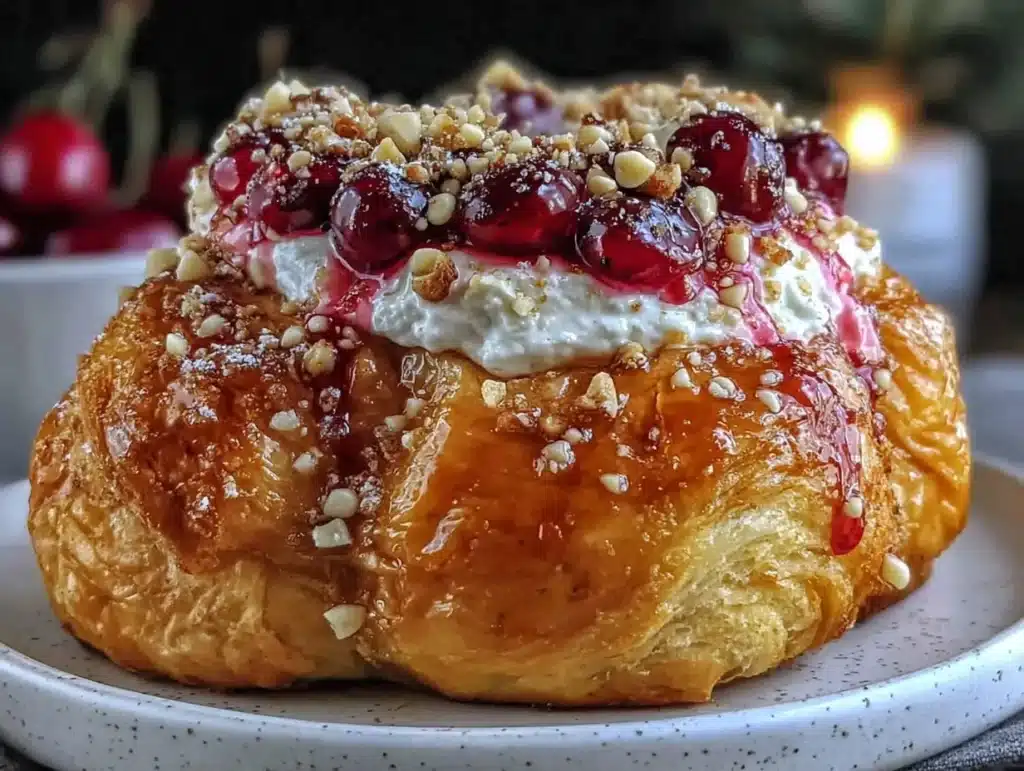
The smell of warm, buttery pastry filling the the kitchen with a hint of tart cherry is pure nostalgia. I first stumbled upon this Easy Cherry Hawaiian Danishes recipe during a rainy Sunday morning when I had nothing but stale croissants and a can of pie filling. Honestly, I didn’t think it would work, but the result was nothing short of magical. These pastries are soft, sweet, and incredibly easy to make, making them perfect for busy families or anyone craving a quick treat.
As someone who loves stretching a grocery budget without sacrificing flavor, I’ve tested this recipe over a dozen times. It’s become a staple in my home because it uses inexpensive ingredients to create a bakery-quality experience. You know how some recipes feel like they require a degree in culinary arts? This one doesn’t. It’s just simple, reliable, and delicious. Let’s face it, life is stressful enough, so why make breakfast complicated?
I’ve found that using store-bought ingredients creatively can save both time and money. This Easy Cherry Hawaiian Danishes recipe is proof that you don’t need to spend a fortune to impress your guests or satisfy your sweet tooth. Whether you’re looking for a quick snack or a special weekend breakfast, this recipe delivers. It’s comforting, familiar, and surprisingly sophisticated for how little effort it takes. Plus, the vibrant red cherry filling makes it visually stunning, which is perfect for sharing on social media or serving at brunch.
What I love most about these danishes is their versatility. You can adjust the sweetness, swap out the fruit, or even add a glaze for extra flair. They’re great for picky eaters and adult foodies alike. After making this recipe multiple times, I’ve learned that the key is in the assembly and baking time. It’s a skill I’ve honed through trial and error, and now I’m sharing it with you. This isn’t just another pastry recipe; it’s a budget-friendly hack that tastes like a indulgence. Trust me, once you try these, you’ll be coming back for seconds.
Why You’ll Love This Recipe
- Quick & Easy: These Easy Cherry Hawaiian Danishes come together in under 30 minutes, making them perfect for last-minute cravings or busy weeknights. You won’t believe how fast they go from oven to plate.
- Simple Ingredients: You likely already have everything in your kitchen. No fancy grocery trips needed, just pantry staples and a can of cherry filling.
- Perfect for Brunch: These pastries are ideal for weekend brunches, holiday mornings, or just a cozy afternoon tea. They look elegant but are effortless to prepare.
- Crowd-Pleaser: Kids and adults alike love the sweet-tart flavor combination. They’re always a hit at potlucks and family gatherings.
- Unbelievably Delicious: The texture is soft and fluffy, with a burst of cherry flavor in every bite. It’s comfort food reimagined—healthier, faster, but with the same soul-soothing satisfaction.
- Cost-Effective: This recipe is all about the cheap ingredient doing all the work. By using accessible items, you create a high-value treat that doesn’t break the bank.
What makes this recipe different from the rest is the simplicity of the method. You don’t need to roll out dough or make a filling from scratch. The cherry pie filling provides the moisture and flavor, while the pastry base bakes up golden and crisp. It’s a creative twist on traditional danishes that saves time without compromising taste. I’ve found that this approach works best when you use quality store-bought pastries, as they provide a sturdy base that holds up well under the filling.
Emotionally, this recipe taps into the joy of simple pleasures. There’s something special about pulling a tray of warm pastries out of the oven and sharing them with loved ones. It’s the kind of treat that makes you close your eyes after the first bite. It’s not just good—it’s memorable. Whether you’re impressing guests or treating yourself, these danishes turn a simple meal into something special.
What Ingredients You Will Need
This recipe uses simple, wholesome ingredients to deliver bold flavor and satisfying texture without the fuss. Most of these items are pantry staples, making it easy to whip up on a whim. You can also swap in seasonal fruits if cherries aren’t your preference, but the cherry filling adds a classic sweet-tart balance that’s hard to beat.
- Store-bought puff pastry or croissants: 1 package (about 16 oz). I recommend using pre-made puff pastry for a flaky texture, or croissants for a softer, bread-like base. Look for brands with minimal additives for better taste.
- Cherry pie filling: 1 can (21 oz). This is the star of the show. Use a standard can of cherry pie filling for convenience. If you prefer less sweetness, look for reduced-sugar versions.
- Butter: 2 tablespoons, melted. Unsalted butter works best, but salted is fine if you adjust the seasoning. Melt it in the microwave for easy brushing.
- Granulated sugar: 1/4 cup. Adds a slight crunch and sweetness to the top. You can substitute with brown sugar for a deeper flavor.
- Cinnamon: 1 teaspoon. Enhances the cherry flavor and adds warmth. Use ground cinnamon for the best aroma.
- Vanilla extract: 1 teaspoon. Optional, but adds a subtle depth to the butter brush. Pure vanilla is worth the extra cost.
- Powdered sugar: For dusting (optional). Adds a touch of elegance if you’re serving these at a gathering.
For the best results, ensure your pastry is thawed if frozen, and your cherry filling is at room temperature. This helps the filling spread evenly and bake uniformly. If you’re using croissants, slice them in half horizontally to create a pocket for the filling. This small step makes a big difference in the final presentation.
Equipment Needed
To make these Easy Cherry Hawaiian Danishes, you’ll need a few basic kitchen tools. A baking sheet is essential, preferably lined with parchment paper for easy cleanup. A small microwave-safe bowl is handy for melting the butter quickly. A pastry brush helps apply the butter evenly, ensuring every bite is rich and flavorful. If you don’t have a pastry brush, a silicone spatula works just as well.
A cooling rack is useful for letting the pastries cool before dusting with powdered sugar. This prevents them from getting soggy. While not strictly necessary, a kitchen scale can help if you want to be precise with measurements, though volume measurements work fine here. For budget-friendly options, use a standard metal baking sheet instead of a non-stick one, and wash it thoroughly before use. Avoid using glass dishes, as they don’t conduct heat as evenly for pastries.
Preparation Method
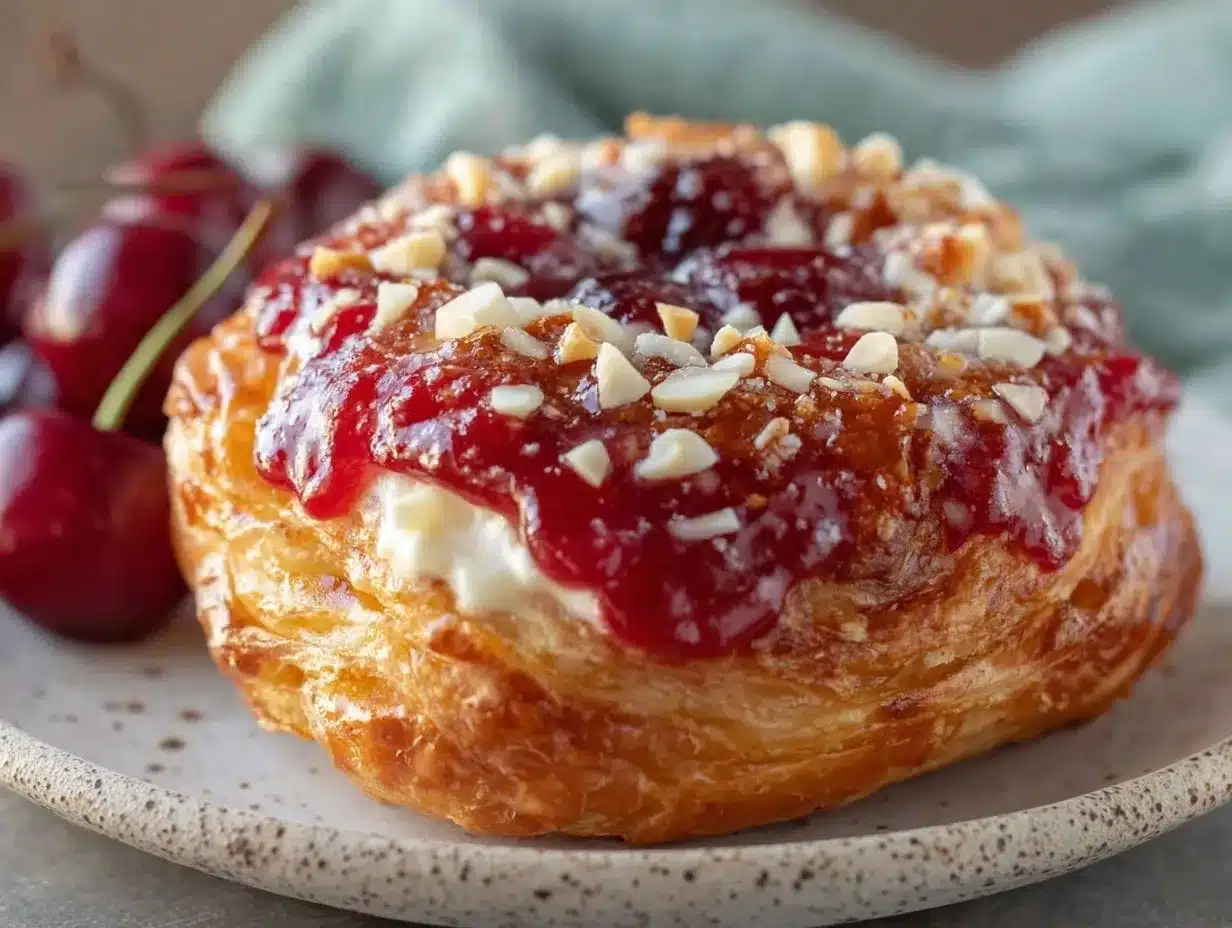
- Preheat the oven to 375°F (190°C). This ensures the pastries bake evenly from the start. Take about 5 minutes for the oven to reach temperature.
- Prepare the baking sheet by lining it with parchment paper. This prevents sticking and makes cleanup a breeze. You can also grease the sheet lightly with butter if you prefer.
- Prepare the pastry. If using puff pastry, thaw it according to package instructions. Cut it into 8 equal squares. If using croissants, slice them in half horizontally. This step takes about 5 minutes.
- Melt the butter in a microwave-safe bowl. Heat it in 15-second intervals, stirring in between, until fully melted. This should take about 30 seconds total.
- Mix the topping. In a small bowl, combine the granulated sugar and cinnamon. Stir until well mixed. This creates a fragrant, sweet crust.
- Assemble the danishes. Place the pastry squares or croissant halves on the baking sheet. Spoon a generous amount of cherry pie filling onto the center of each piece. Be careful not to overfill, as the filling can bubble over during baking.
- Brush with butter. Use the pastry brush to lightly coat the top of each danish with melted butter. This helps the sugar adhere and adds richness. Sprinkle the cinnamon-sugar mixture evenly over the buttered tops.
- Bake for 15-20 minutes, or until the pastries are golden brown and the filling is bubbly. Keep an eye on them around the 15-minute mark to prevent burning.
- Cool slightly. Let the danishes cool on the baking sheet for 5 minutes. This allows the filling to set slightly, making them easier to handle.
- Dust with powdered sugar (optional). If desired, sift a light layer of powdered sugar over the cooled danishes for a finishing touch. Serve warm for the best experience.
Cooking Tips & Techniques
One common mistake is overfilling the pastries, which can cause the filling to spill out and burn. Use about 2 tablespoons of filling per danish to avoid this. Another tip is to ensure your oven is fully preheated before baking. An underheated oven can result in soggy pastries. I learned this the hard way after my first batch came out limp and dense.
For consistent results, use a thermometer to check your oven temperature. Ovens can vary, so a reliable reading helps. Also, avoid opening the oven door too often during baking, as this can cause the pastries to collapse. If you’re multitasking, prepare the topping mixture while the oven preheats to save time. This keeps your workflow smooth and efficient.
Personal tip: If you’re using croissants, toast them lightly before adding the filling to give them a bit of structure. This prevents them from becoming too soft. Also, let the butter cool slightly before brushing to avoid melting the pastry too quickly. These small adjustments make a big difference in texture and taste.
Variations & Adaptations
Feel free to customize this recipe to suit your taste. For a less sweet option, use unsweetened applesauce instead of cherry pie filling. You can also add a layer of cream cheese to the filling for a richer flavor. If you’re vegan, substitute the butter with coconut oil and use a plant-based pastry. These adaptations maintain the essence of the recipe while catering to different dietary needs.
For seasonal variations, swap the cherry filling for apple or peach pie filling in the fall. In summer, fresh berries work beautifully if you cook them down slightly to reduce moisture. I once tried adding a tablespoon of lemon juice to the cherry filling for a brighter flavor, and it was a hit. Don’t be afraid to experiment with spices like nutmeg or cardamom for a unique twist.
For gluten-free options, use gluten-free puff pastry or croissants. Just ensure the filling is also gluten-free, as some pie fillings contain wheat starch. These small changes allow everyone to enjoy the treat, regardless of dietary restrictions.
Serving & Storage Suggestions
Serve these Easy Cherry Hawaiian Danishes warm for the best flavor and texture. They pair well with a cup of coffee or tea, making them a perfect afternoon snack. For presentation, dust with powdered sugar and garnish with a fresh mint leaf. They look elegant on a platter and are great for sharing.
Store leftovers in an airtight container at room temperature for up to 2 days. For longer storage, freeze the unbaked danishes on a baking sheet, then transfer to a freezer bag. Bake from frozen, adding 5 minutes to the baking time. To reheat, warm them in the oven at 350°F for 5-10 minutes. Avoid microwaving, as it can make the pastry soggy.
The flavors develop over time, becoming richer as the filling melds with the pastry. If you’re meal prepping, these danishes hold up well in the fridge, though they’re best enjoyed fresh. For a special occasion, serve them with a side of whipped cream or vanilla ice cream for an extra indulgent touch.
Nutritional Information & Benefits
Each Easy Cherry Hawaiian Danish contains approximately 250 calories, with 15g of carbohydrates, 8g of fat, and 3g of protein. The cherry filling provides vitamin C and antioxidants, while the pastry offers energy from carbohydrates. For a healthier twist, use whole-grain pastry or reduce the sugar in the topping.
These pastries are gluten-free if made with gluten-free ingredients, and they can be adapted to be dairy-free or vegan. They’re a moderate treat, so enjoy them in moderation as part of a balanced diet. From a wellness perspective, they offer a quick energy boost, making them ideal for a morning snack. I find that they satisfy my sweet cravings without leaving me feeling heavy, which is a win in my book.
Conclusion
These Easy Cherry Hawaiian Danishes are a budget-friendly sweet treat that delivers big on flavor. With simple ingredients and minimal effort, you can create a bakery-quality pastry that’s perfect for any occasion. I love this recipe because it’s reliable, delicious, and easy to customize. Whether you’re feeding a crowd or treating yourself, these danishes are sure to please.
Try adding your own twist, like swapping the fruit or adjusting the sweetness. I’d love to hear how you make them your own! Share your creations in the comments below, and don’t forget to tag me on social media. Happy baking, and enjoy every bite of these sweet, cherry-filled delights!
FAQs
Can I use fresh cherries instead of pie filling?
Yes, but you’ll need to cook them down with sugar and thickener to prevent a soggy pastry. Pie filling is easier and more consistent.
How do I store leftover danishes?
Store them in an airtight container at room temperature for up to 2 days. Freeze unbaked danishes for longer storage.
Can I make these ahead of time?
Yes, assemble them and refrigerate overnight. Bake in the morning for fresh, warm pastries.
What’s the best pastry to use?
Puff pastry gives a flaky texture, while croissants offer a softer, bread-like base. Both work well.
Are these danishes gluten-free?
Use gluten-free puff pastry or croissants and ensure the filling is gluten-free for a gluten-free option.
Pin This Recipe!


Easy Cherry Hawaiian Danishes: 5-Cost Sweet Treat
- Total Time: 30 minutes
- Yield: 8 servings 1x
Description
A quick and budget-friendly pastry recipe using store-bought puff pastry or croissants and cherry pie filling, perfect for busy mornings or weekend brunches.
Ingredients
- 1 package (16 oz) store-bought puff pastry or croissants
- 1 can (21 oz) cherry pie filling
- 2 tablespoons unsalted butter, melted
- 1/4 cup granulated sugar
- 1 teaspoon ground cinnamon
- 1 teaspoon vanilla extract (optional)
- Powdered sugar for dusting (optional)
Instructions
- Preheat the oven to 375°F (190°C).
- Line a baking sheet with parchment paper.
- If using puff pastry, thaw according to package instructions and cut into 8 equal squares. If using croissants, slice them in half horizontally.
- Melt the butter in a microwave-safe bowl.
- In a small bowl, mix the granulated sugar and cinnamon.
- Place the pastry squares or croissant halves on the baking sheet.
- Spoon a generous amount (about 2 tablespoons) of cherry pie filling onto the center of each piece.
- Brush the tops lightly with melted butter.
- Sprinkle the cinnamon-sugar mixture evenly over the buttered tops.
- Bake for 15-20 minutes until golden brown and filling is bubbly.
- Cool on the baking sheet for 5 minutes.
- Dust with powdered sugar if desired and serve warm.
Notes
Ensure the oven is fully preheated to avoid soggy pastries. Do not overfill the pastries to prevent spillage. For a gluten-free option, use gluten-free puff pastry and ensure the filling is gluten-free. Store leftovers in an airtight container at room temperature for up to 2 days.
- Prep Time: 10 minutes
- Cook Time: 20 minutes
- Category: Breakfast
- Cuisine: American
Nutrition
- Serving Size: 1 danish
- Calories: 250
- Sugar: 12
- Sodium: 180
- Fat: 8
- Saturated Fat: 3
- Carbohydrates: 15
- Fiber: 1
- Protein: 3
Keywords: cherry danishes, easy breakfast, budget recipes, puff pastry recipes, cherry pie filling, quick brunch, sweet treats