The smell of caramelized pineapple hitting hot butter is the kind of scent that stops traffic. I remember being seven years old, standing on a step stool in my grandmother’s kitchen, watching that golden syrup bubble around the edges of the skillet. It wasn’t just a dessert; it was an event. We didn’t have fancy bakeries in our small town, so Sunday afternoons meant this cake. My grandmother never measured anything. She cooked by feel, by sight, and by the patience to let the sugar turn just right. Today, I make it for my own kids, but the magic is exactly the same.
Let’s face it, buying a store-bought upside-down cake feels like a letdown. It’s dry, the fruit is mushy, and the flavor is one-dimensional. But making it from scratch? That’s where the real joy is. And honestly, I’ve found a way to make this recipe not just a special occasion treat, but a smart, budget-friendly staple. You know how I love stretching a dollar? This cake is proof that you don’t need expensive ingredients to create something that tastes like luxury. In fact, the leftovers are so good that I’ve started counting on them for next-day breakfasts.
I’ve tested this Moist Pineapple Upside Down Cake recipe over a dozen times. I’ve used canned rings, I’ve used fresh slices, and I’ve tried different butters. The version I’m sharing today is the winner. It’s moist, it’s tangy, and it uses pantry staples you likely already have. It’s perfect for busy weeknights if you prep the night before, or for those lazy Saturday mornings when you want something sweet without the stress. Plus, the “one-batch leftover hack” I’ll share later means you get two meals for the price of one batter. That’s value I can get behind.
Why You’ll Love This Recipe
After years of baking, I’ve learned that the best recipes are the ones that solve a problem. This cake solves the problem of “what do I bake that feels fancy but doesn’t cost a fortune?” Here is why this specific version has earned a permanent spot in my recipe box and on your table.
- Quick & Easy: Unlike many layer cakes that require hours of cooling and frosting, this comes together in under 45 minutes. The caramel happens in the pan while you mix the batter. It’s perfect for busy weeknights or last-minute cravings when you need something sweet ASAP.
- Simple Ingredients: No fancy grocery trips needed. You probably have flour, sugar, butter, eggs, and baking powder in your kitchen right now. The only specialty item is pineapple, and even that is affordable, especially when you use canned rings on sale.
- Perfect for Brunch or Dessert: This recipe is incredibly versatile. Serve it warm with a dollop of whipped cream for dessert, or slice it cold the next morning with coffee for a hearty breakfast. It transitions seamlessly between meals.
- Crowd-Pleaser: Kids love the sweetness, and adults appreciate the tangy balance of the pineapple. It always gets rave reviews from guests who don’t even realize it’s a budget-friendly bake.
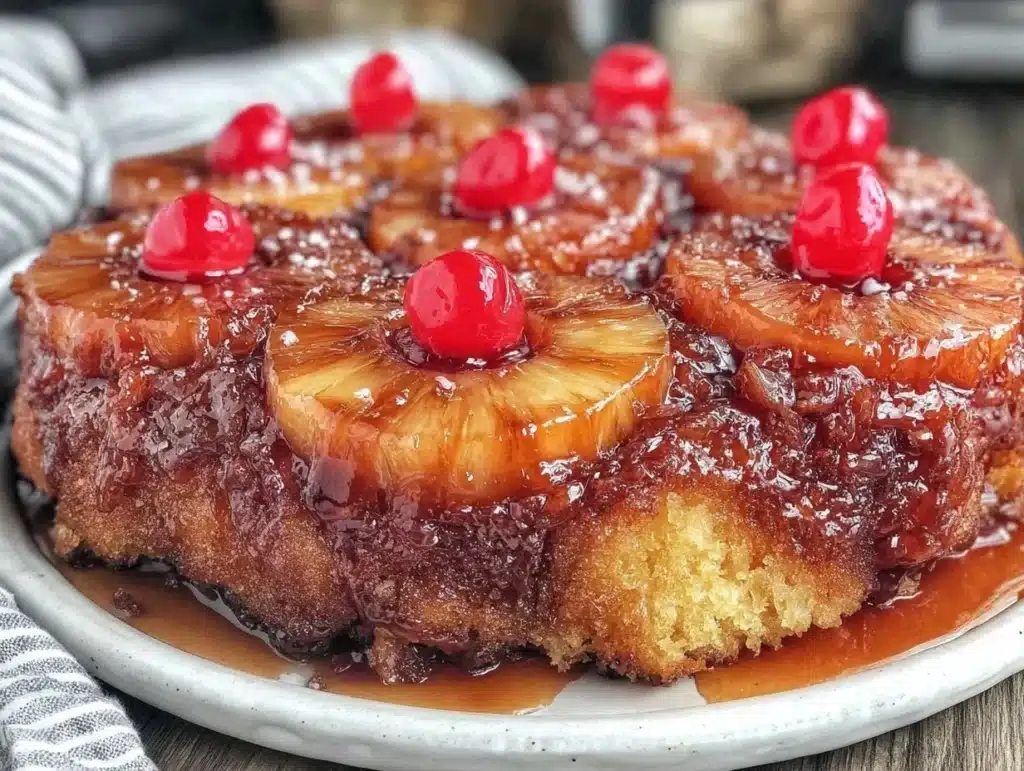
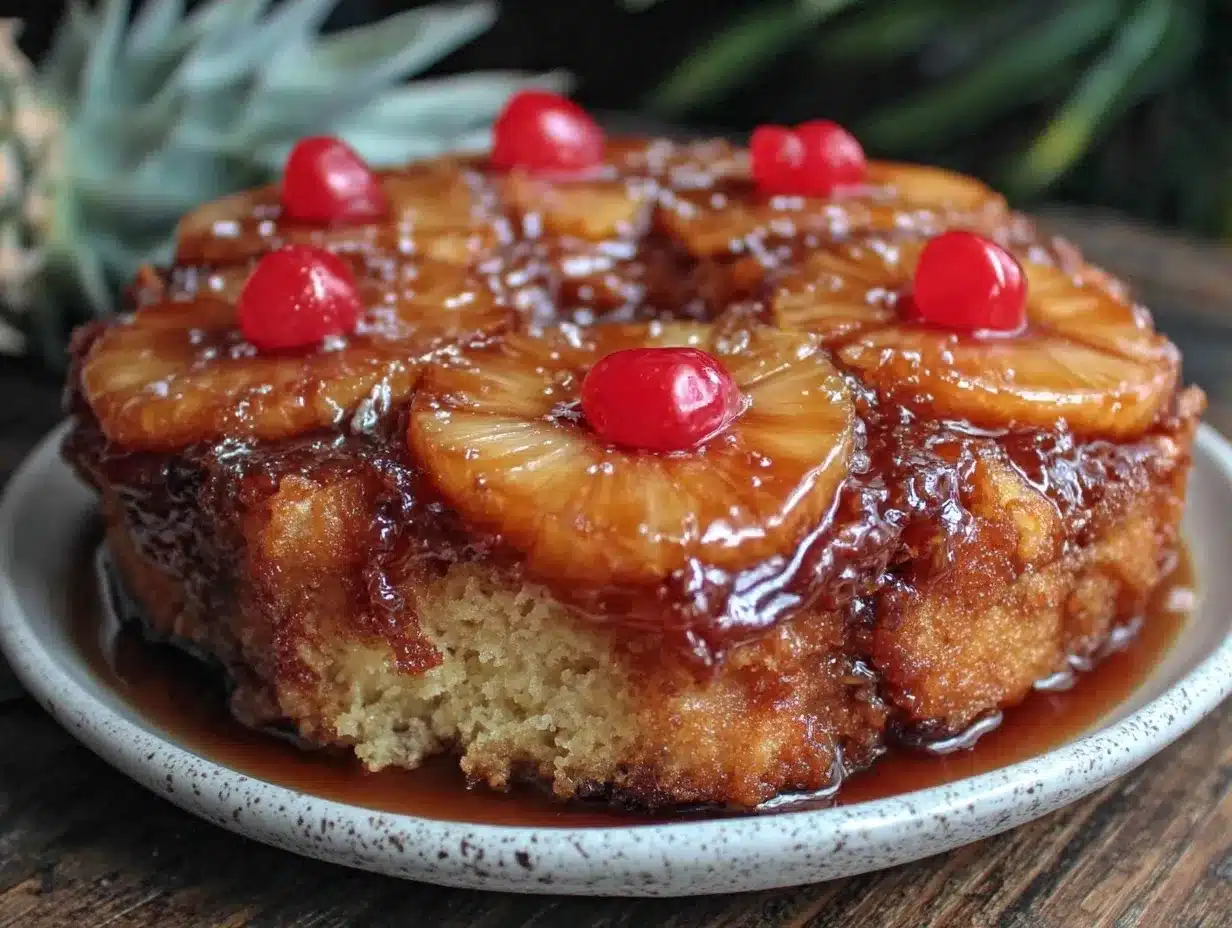
- Unbelievably Delicious: The texture is next-level comfort food. The bottom layer becomes a sticky, caramelized glaze that soaks into the cake as it cools. It’s moist, tender, and has that perfect chew.
What makes this recipe different from the rest is the technique. I use a slightly higher ratio of brown sugar to butter in the base, which creates a deeper, more robust caramel flavor without burning. I also add a splash of vanilla extract to the batter to round out the tropical notes. This isn’t just another version of an old classic; it’s my tested, family-approved best version. It’s the kind of cake that makes you close your eyes after the first bite. It’s comfort food reimagined—healthier (in my mind, because it’s homemade), faster, but with the same soul-soothing satisfaction my grandmother used to make. Plus, the leftover hack means you can turn tonight’s dinner into tomorrow’s lunch, for free.
What Ingredients You Will Need
This recipe uses simple, wholesome ingredients to deliver bold flavor and satisfying texture without the fuss. The beauty of an upside-down cake is that it relies on quality basics rather than complex chemical leaveners or exotic flours. Most of these items are pantry staples, which fits my philosophy of stretching the grocery budget. You aren’t buying five different types of specialty flour or expensive chocolates. You’re building something delicious from the ground up.
Here is what you’ll need to pull this off. I’ve grouped them by function so you can grab everything at once.
For the Caramel Base
- Unsalted butter, softened: 1/2 cup (113g). I recommend using a high-quality European-style butter if you can find it on sale, as the higher fat content creates a richer caramel. But standard unsalted works fine too.
- Brown sugar, packed: 1 cup (200g). Dark brown sugar is my preference because it has more molasses, which gives that deep, toffee-like flavor. Light brown works, but dark is better for depth.
- Pineapple rings, canned: 8 to 10 rings. Do not buy fresh pineapple for this; it’s too watery and expensive. Canned rings in juice (not syrup) are perfect. They are pre-sliced, consistent, and cheap. Look for brands like Dole or Del Monte when they are on clearance.
- Maraschino cherries: 8 to 10 cherries. The classic red dot on top of each pineapple ring. You can skip this if you want, but it adds that nostalgic visual appeal.
For the Cake Batter
- All-purpose flour: 1 1/2 cups (190g). Standard flour is all you need. No need to buy cake flour unless you want a lighter crumb, but AP flour gives a tender, sturdy texture.
- Granulated sugar: 1 cup (200g). This balances the sweetness of the brown sugar base.
- Unsalted butter, melted: 1/2 cup (113g). This is different from the base butter. Melted butter keeps the cake moist.
- Eggs, large: 2 large eggs, room temperature. Room temp eggs emulsify better into the batter, leading to a smoother mix.
- Pineapple juice: 1/2 cup (120ml). Save the juice from your can of pineapple! Do not throw it away. It adds intense pineapple flavor without extra cost.
- Baking powder: 1 1/2 teaspoons. Make sure this is fresh for proper rise.
- Salt: 1/2 teaspoon. Just a pinch to balance the sweetness.
- Vanilla extract: 1 teaspoon. Pure vanilla, not imitation, makes a noticeable difference.
For substitutions, you can use dairy-free butter if needed, though the flavor will be slightly different. You can also swap the all-purpose flour for a 1:1 gluten-free blend if you have dietary restrictions, though the texture may be slightly denser. The key is to keep the liquid-to-dry ratio similar.
Equipment Needed
You don’t need a fancy kitchen to make this cake. In fact, keeping the equipment list simple is part of the appeal. Here is what you’ll need.
- 9-inch Cast Iron Skillet: This is the traditional tool for upside-down cakes. Cast iron retains heat beautifully, which helps caramelize the sugar evenly. If you don’t have one, a 9-inch pie dish or a square baking pan works too, but cast iron gives the best crust.
- Mixing Bowls: Two medium bowls. One for the dry ingredients, one for the wet.
- Whisk: A simple balloon whisk is fine. You don’t need a mixer if you mix by hand, which actually helps prevent overmixing.
- Measuring Cups and Spoons: For accuracy. Baking is chemistry, after all.
- Spatula: A rubber spatula is helpful for scraping the bowl and folding the batter gently.
If your cast iron skillet is well-seasoned, you won’t even need to grease it. The butter in the base does the work. Just make sure your skillet is oven-safe. Some non-stick skillets have plastic handles that can’t go in the oven, so check yours first. A simple stainless steel skillet works too, but you’ll need to grease it thoroughly to prevent sticking.
Preparation Method
Let’s get into the nitty-gritty. This process is straightforward, but timing is everything. Follow these steps closely for the best results.
Step 1: Prep the Oven and Pan (5 minutes)
Preheat your oven to 350°F (175°C). If you are using a cast iron skillet, place it in the oven while it preheats. This helps the pan get hot, which kickstarts the caramelization process. If you are using a glass or metal baking dish, you can prep it now.
Step 2: Make the Caramel Base (5 minutes)
In your skillet (or in a small saucepan if using a different dish), melt the 1/2 cup of softened butter over medium heat. Once melted, stir in the 1 cup of packed brown sugar. Cook this mixture for about 2-3 minutes, stirring constantly, until it bubbles and looks like thick syrup. Be careful not to burn it. If it starts to smoke, take it off the heat immediately.
Step 3: Arrange the Pineapple (2 minutes)
Carefully remove the hot skillet from the oven (if you heated it) or keep it on the stovetop. Drain the pineapple rings well. Arrange them in a single layer in the bottom of the skillet, overlapping them slightly if needed to cover the bottom. Place a cherry in the center of each ring. Pour any remaining syrup from the can over the fruit. This extra sweetness is key.
Step 4: Mix the Dry Ingredients (3 minutes)
In a medium bowl, whisk together the 1 1/2 cups of flour, 1 1/2 teaspoons of baking powder, and 1/2 teaspoon of salt. Set this aside. Keeping dry and wet separate ensures even distribution.
Step 5: Mix the Wet Ingredients (3 minutes)
In a larger bowl, cream together the 1 cup of granulated sugar and the 1/2 cup of melted butter. Beat until combined. Add the 2 eggs one at a time, mixing well after each addition. Stir in the 1/2 cup of pineapple juice and 1 teaspoon of vanilla extract. The mixture should look slightly curdled; this is normal.
Step 6: Combine and Bake (35-40 minutes)
Gently fold the dry ingredients into the wet ingredients using a spatula. Do not overmix. Stop as soon as no streaks of flour remain. Pour the batter over the pineapple layer in the skillet. Smooth the top with a spatula.
Place the skillet in the preheated oven. Bake for 35-40 minutes. The cake is done when a toothpick inserted into the center comes out clean or with just a few moist crumbs. The top should be golden brown and the edges may pull away slightly.
Step 7: Cool and Invert (20 minutes)
This is the most critical step. Let the cake cool in the skillet for 10 minutes. If you try to invert it hot, it will fall apart. If you wait too long, the caramel hardens and sticks. After 10 minutes, place a large serving plate over the skillet. Using oven mitts, confidently flip the skillet and plate over. Lift the skillet off. If a few pineapple pieces stick, just pat them back into place. The caramel will be hot and sticky, so be careful.
Cooking Tips & Techniques
Having baked this cake many times, I’ve learned a few tricks to avoid common pitfalls. The biggest mistake people make is rushing the cooling process. I know it’s tempting to eat it immediately, but patience pays off. Letting it cool for 10 minutes allows the caramel to set slightly, making it easier to release from the pan without breaking the fruit layer.
Another tip is to drain the pineapple rings well. If they are too wet, the bottom of the cake can become soggy. I usually pat them dry with a paper towel before arranging them. Also, when you melt the butter and brown sugar for the base, keep the heat medium. High heat can burn the sugar quickly, giving you a bitter taste instead of a sweet, toffee flavor. If you see dark spots forming in the butter, take it off the heat immediately.
For consistency, make sure your eggs are at room temperature. Cold eggs can cause the melted butter to seize up, creating little lumps in your batter. This doesn’t affect safety, but it can affect texture. If you forget to take them out, just place them in a bowl of warm water for 5 minutes.
And let’s talk about the flip. It can be scary. But trust the process. If you are nervous, you can always serve it right-side up in the skillet. It still tastes amazing. But for that classic presentation, a confident flip is worth the risk. If a piece sticks, don’t worry. It’s rustic and real. No one will mind a little extra caramel on their fork.
Variations & Adaptations
While the classic version is my favorite, this recipe is flexible. Here are a few ways to adapt it.
Coconut Twist: Add 1/2 cup of shredded coconut to the batter. It adds a nice texture and complements the pineapple perfectly. You can also sprinkle some toasted coconut on top before flipping.
Spiced Version: Add 1/2 teaspoon of cinnamon and a pinch of nutmeg to the dry ingredients. This gives it a warmer, more autumnal flavor profile, which is great for holiday gatherings.
Fruit Swap: You can use peaches or apples instead of pineapple. For apples, slice them thin and toss them with a little lemon juice to prevent browning. The caramel base remains the same.
Dairy-Free: Use dairy-free butter and a plant-based milk instead of pineapple juice if you prefer. The texture might be slightly denser, but it’s still delicious.
My Personal Favorite: I sometimes add a layer of crushed graham crackers to the bottom of the skillet before the pineapple. It adds a cookie-like crust that contrasts nicely with the soft cake. It’s a little extra step, but worth it for the crunch.
Serving & Storage Suggestions
This cake is best served warm, but it’s also fantastic at room temperature. For serving, I like to add a dollop of lightly sweetened whipped cream or a scoop of vanilla ice cream. The contrast between the warm, sticky cake and the cold cream is heavenly.
For storage, cover the cake tightly with plastic wrap or aluminum foil. It will keep in the refrigerator for up to 5 days. In fact, the flavors meld together over time, making it even better on day two. This is where the “one-batch leftover hack” comes in. I often slice it cold for breakfast the next morning. It’s filling, sweet, and feels like a treat without the guilt of a full dessert portion.
You can also freeze slices of this cake. Wrap them individually in plastic wrap and then in foil. They will keep for up to 2 months. To reheat, just thaw them in the fridge and warm them in the microwave for 30 seconds. It brings back that fresh-baked aroma.
Nutritional Information & Benefits
While this is a dessert, it does have some redeeming qualities. Pineapple is rich in vitamin C and manganese, and it contains bromelain, an enzyme that aids digestion. Using canned pineapple in juice instead of syrup reduces the added sugar content compared to syrup-packed fruit. However, this is still a sweet treat, so enjoy it in moderation. Each slice (assuming 8 slices) contains approximately 350 calories, 15g of fat, and 50g of carbohydrates. It’s not a health food, but it’s a reasonable indulgence, especially when you consider the cost-effectiveness of the ingredients.
Conclusion
Moist Pineapple Upside Down Cake is more than just a recipe; it’s a way to bring warmth and nostalgia to your kitchen without breaking the bank. With simple ingredients, minimal equipment, and a smart approach to leftovers, it’s perfect for any home cook. I hope you try this version and make it your own. Whether you add coconut, spices, or serve it plain, it’s sure to be a hit. Let me know in the comments how you enjoyed it, and don’t forget to share your leftover hacks. Happy baking!
Frequently Asked Questions
Can I use fresh pineapple instead of canned?
Yes, but you’ll need to slice it thinly and cook it slightly before adding it to the pan to remove excess moisture. Canned rings are easier and more consistent for this recipe.
Why did my cake stick to the pan?
This usually happens if you don’t let it cool long enough or if the caramel burned. Make sure to wait 10 minutes before flipping, and ensure your brown sugar mixture is golden, not dark brown.
Can I make this cake ahead of time?
Absolutely. You can make the caramel and arrange the fruit the night before. Just cover the pan and refrigerate. Let it come to room temperature before baking.
Is there a gluten-free option?
Yes, use a 1:1 gluten-free flour blend. The texture may be slightly denser, but it will still be delicious.
How do I reheat leftover cake?
Microwave a slice for 20-30 seconds to soften the caramel. You can also warm it in a 300°F oven for 10 minutes.
Pin This Recipe!
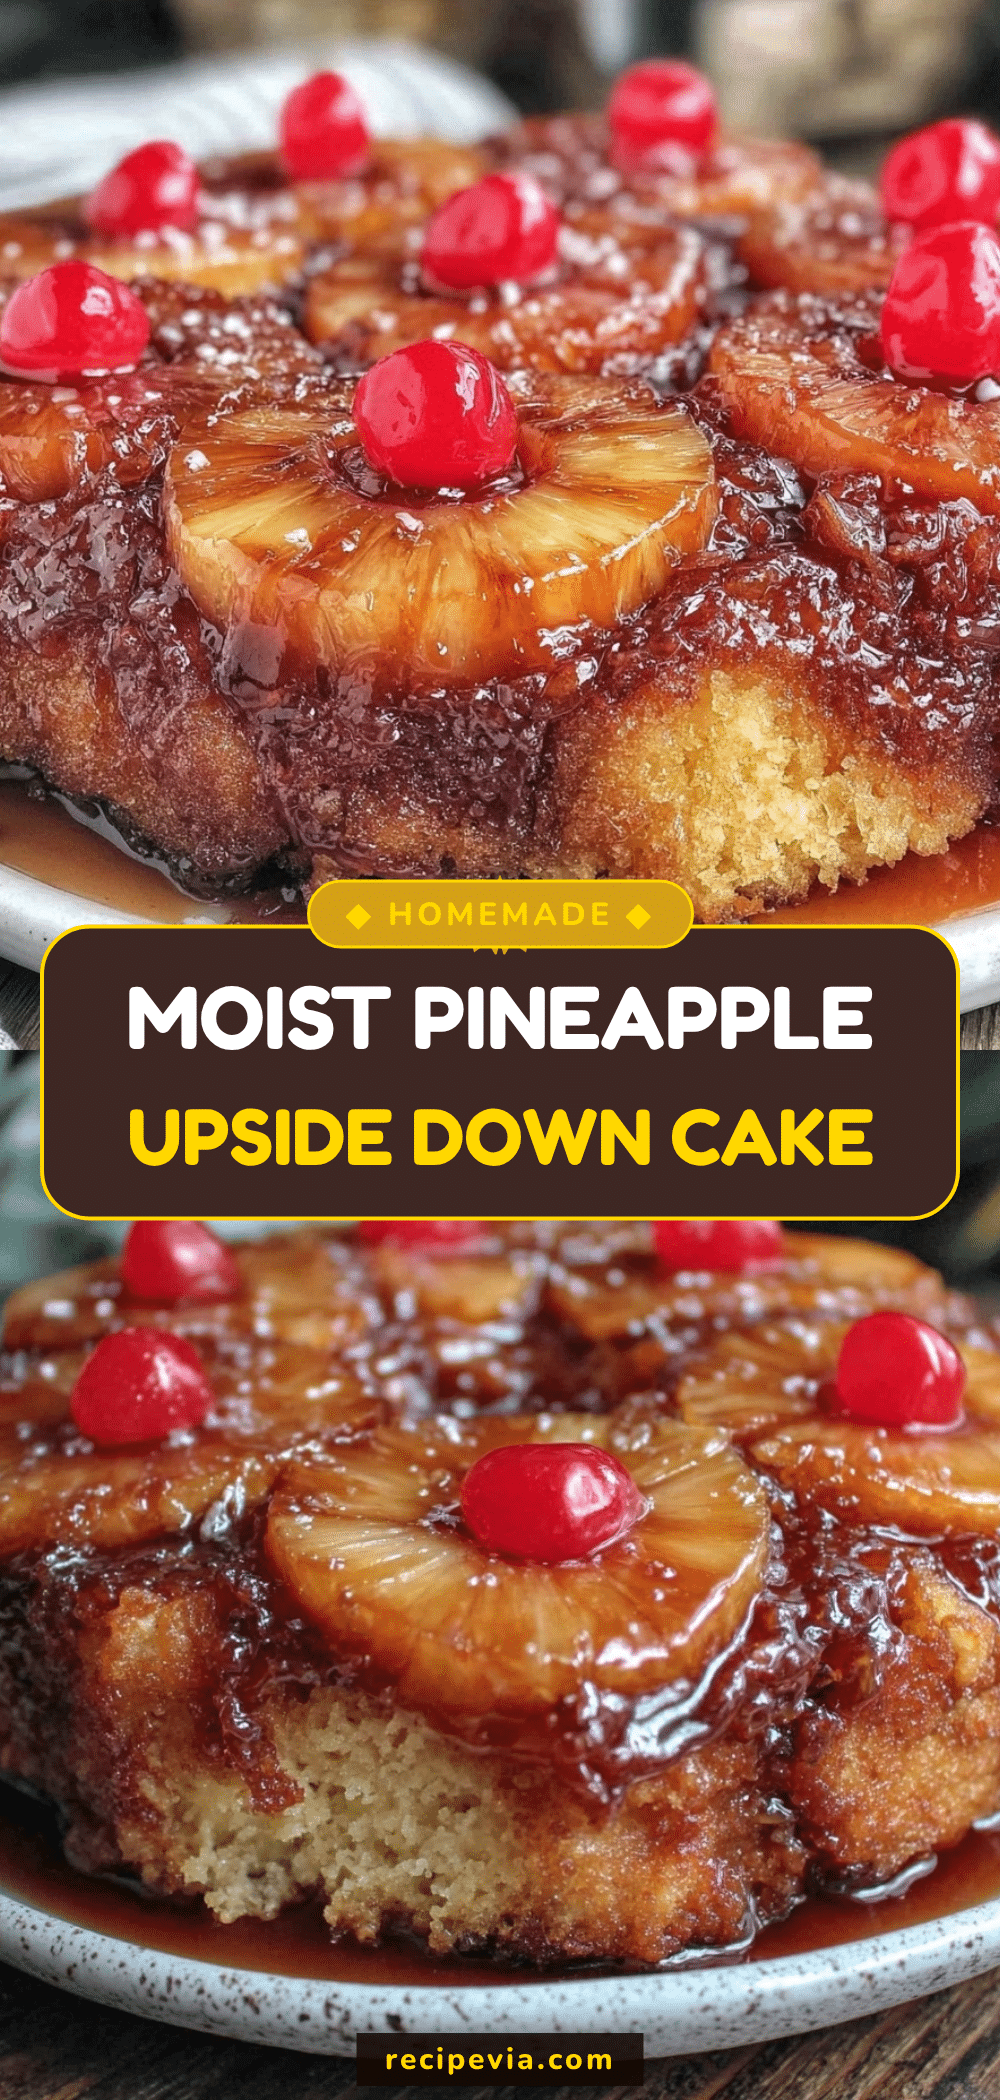

Moist Pineapple Upside Down Cake: 1-Batch Leftover Hack
- Total Time: 55 minutes
- Yield: 8 servings 1x
Description
A budget-friendly, moist pineapple upside-down cake made with pantry staples. This recipe features a rich caramel base and yields leftovers perfect for breakfast.
Ingredients
- 1/2 cup (113g) unsalted butter, softened (for caramel base)
- 1 cup (200g) packed brown sugar (dark preferred)
- 8 to 10 canned pineapple rings (in juice, not syrup)
- 8 to 10 maraschino cherries
- 1 1/2 cups (190g) all-purpose flour
- 1 cup (200g) granulated sugar
- 1/2 cup (113g) unsalted butter, melted (for batter)
- 2 large eggs, room temperature
- 1/2 cup (120ml) pineapple juice (from the can)
- 1 1/2 teaspoons baking powder
- 1/2 teaspoon salt
- 1 teaspoon vanilla extract
Instructions
- Preheat oven to 350°F (175°C). If using a cast iron skillet, place it in the oven to preheat.
- In the skillet (or a saucepan), melt 1/2 cup softened butter over medium heat. Stir in brown sugar and cook for 2-3 minutes until bubbling and syrupy. Do not burn.
- Drain pineapple rings well and arrange them in a single layer in the skillet. Place a cherry in the center of each ring. Pour remaining pineapple syrup over the fruit.
- In a medium bowl, whisk together flour, baking powder, and salt.
- In a larger bowl, cream granulated sugar and melted butter. Beat in eggs one at a time. Stir in pineapple juice and vanilla extract.
- Gently fold dry ingredients into wet ingredients until just combined. Pour batter over the pineapple layer.
- Bake for 35-40 minutes until a toothpick inserted in the center comes out clean.
- Cool in the skillet for 10 minutes. Place a serving plate over the skillet and confidently flip to invert. Lift off skillet and serve warm.
Notes
Ensure eggs are at room temperature to prevent butter from seizing. Drain pineapple rings well to avoid a soggy bottom. Let the cake cool for exactly 10 minutes before flipping to allow caramel to set slightly but not harden. Can be stored in the refrigerator for up to 5 days or frozen for 2 months.
- Prep Time: 15 minutes
- Cook Time: 40 minutes
- Category: Dessert
- Cuisine: American
Nutrition
- Serving Size: 1 slice
- Calories: 350
- Sugar: 38
- Sodium: 250
- Fat: 15
- Saturated Fat: 8
- Carbohydrates: 50
- Fiber: 1
- Protein: 4
Keywords: pineapple upside down cake, budget baking, leftover hack, easy dessert, cast iron cake, family friendly