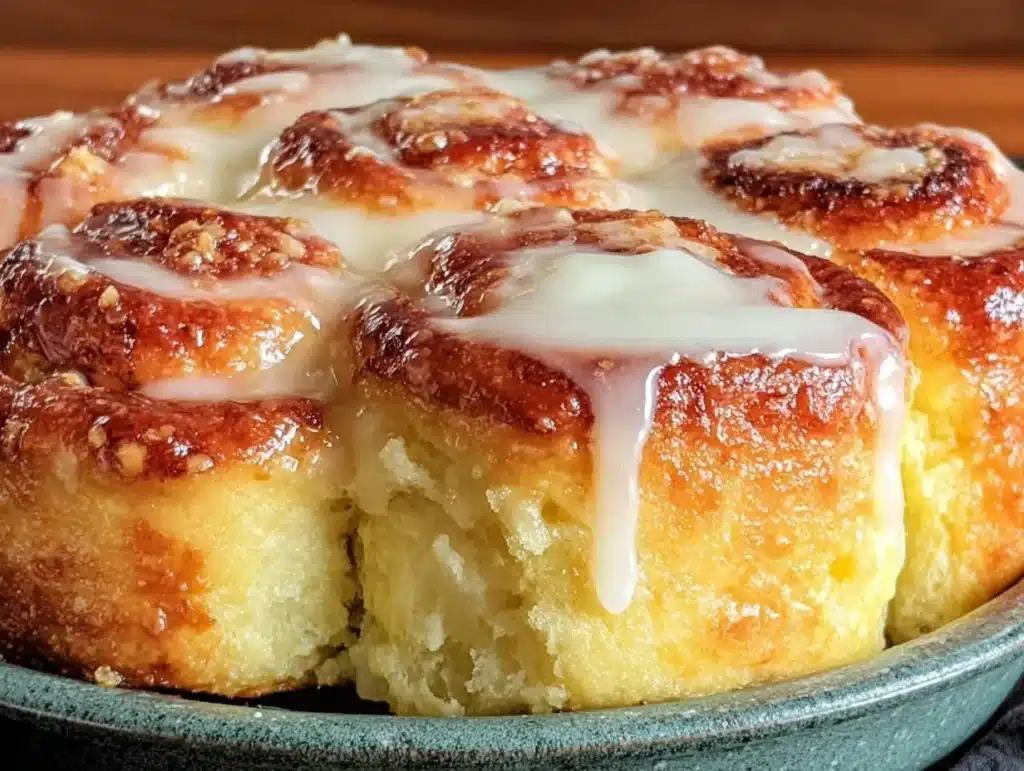
You know that feeling when you’re scrolling through your phone at 10 PM, hungry but trying to be responsible? That’s exactly where I was last winter. I stumbled across a recipe for soft orange rolls with sour cream glaze, and honestly, it changed my Sunday mornings forever. It wasn’t about fancy ingredients or expensive equipment. It was about making something that tasted like a bakery treat without breaking the bank.
I first made these rolls when I was trying to stretch a tight grocery budget. I had a few bruised oranges and a tub of sour cream that needed using up. I didn’t think it would work, but the result was pure magic. The dough was pillowy soft, and that tangy glaze tied everything together perfectly.
If you are looking for a breakfast that feels indulgent but is actually quite economical, this is it. Soft orange rolls with sour cream glaze are perfect for busy families or anyone who wants to feel like a pro baker. I’ve tested this recipe over a dozen times, tweaking the yeast ratios and orange zest amounts. Trust me, this version is the one.
Let’s face it, most bakery rolls are expensive. These homemade versions cost pennies per roll. They are fluffy, citrusy, and incredibly satisfying. You will love how easy they are to pull together, even on a hectic weekend. Plus, the smell alone will wake up the whole house.
Why You’ll Love This Recipe
After baking bread for years, I can tell you that not all doughs are created equal. This specific recipe for soft orange rolls with sour cream glaze strikes a perfect balance. It is forgiving for beginners but impressive enough for guests. Here is why this batch keeps coming back to my kitchen:
- Quick & Easy: The dough comes together in under 30 minutes of active prep. You don’t need to wake up at 5 AM to make these happen.
- Simple Ingredients: You likely already have flour, yeast, sugar, and sour cream in your kitchen. No need for a special grocery run.
- Perfect for Brunch: These are the star of any lazy weekend brunch. They pair beautifully with coffee or tea.
- Crowd-Pleaser: Kids usually hate fancy breakfasts, but they devour these. The orange flavor is sweet but not overpowering.
- Unbelievably Delicious: The sour cream in the dough adds a richness that regular milk can’t match. It keeps the rolls moist for days.
What makes this different from other orange roll recipes? It’s the glaze. Most people just use powdered sugar and orange juice. I use sour cream to add a tangy depth that cuts through the sweetness. It’s a flavor profile that feels sophisticated but is incredibly simple to make. This isn’t just another bread recipe; it’s your new go-to for impressing people without stress.
What Ingredients You Will Need
This recipe relies on humble pantry staples to create something extraordinary. You don’t need fancy flours or expensive extracts. The magic happens in the ratios. Here is what you need to gather before you start mixing.
- All-Purpose Flour: Two and a half cups. I use regular store-brand flour. It has enough protein to hold the air bubbles but isn’t too tough.
- Active Dry Yeast: One packet (2 ¼ teaspoons). Make sure it’s not expired. Old yeast is the enemy of fluffy rolls.
- Warm Milk: Half a cup. Warm to the touch, not hot. You want to wake up the yeast, not kill it.
- Sour Cream: Half a cup. Full-fat is best here. It adds moisture and that signature tang. I prefer brands with thick consistency.
- Granulated Sugar: Half a cup. This feeds the yeast and adds sweetness. Don’t skip it, or the dough won’t rise well.
- Unsalted Butter: Four tablespoons, melted. This adds richness and helps tenderize the crumb.
- Egg: One large egg, room temperature. This binds the dough and adds structure.
- Orange Zest: From two medium oranges. Fresh zest is non-negotiable. Bottled zest just doesn’t have the same punch.
- Salt: One teaspoon. It balances the sweetness and enhances the orange flavor.
For the glaze, you will need one cup of powdered sugar, two tablespoons of sour cream, and two tablespoons of fresh orange juice. If you can’t find fresh oranges, a bit of orange extract works in a pinch, but fresh is always better. Look for oranges that feel heavy for their size; that means more juice and zest.
Equipment Needed
You don’t need a fancy stand mixer to make these rolls. A large mixing bowl and a wooden spoon will do the trick. However, if you have one, it makes kneading much easier. A digital kitchen scale is helpful for measuring flour, but a cup works fine if you scoop lightly.
A 9×13 inch baking dish is ideal for these rolls. It allows them to spread out and bake evenly. If you don’t have one, a large round cake pan works too, but you might need to bake them in two batches. A pastry brush is useful for brushing melted butter on the rolls before baking. It gives them a nice shine and helps the glaze stick later.
I also recommend using a bench scraper if your dough gets sticky. It makes cleaning up your counter much faster. For storage, an airtight container is best to keep the rolls soft. Avoid plastic wrap directly on the glaze, as it will stick. Parchment paper is a good barrier if you need to stack them.
How Do I Know When the Dough Is Ready?
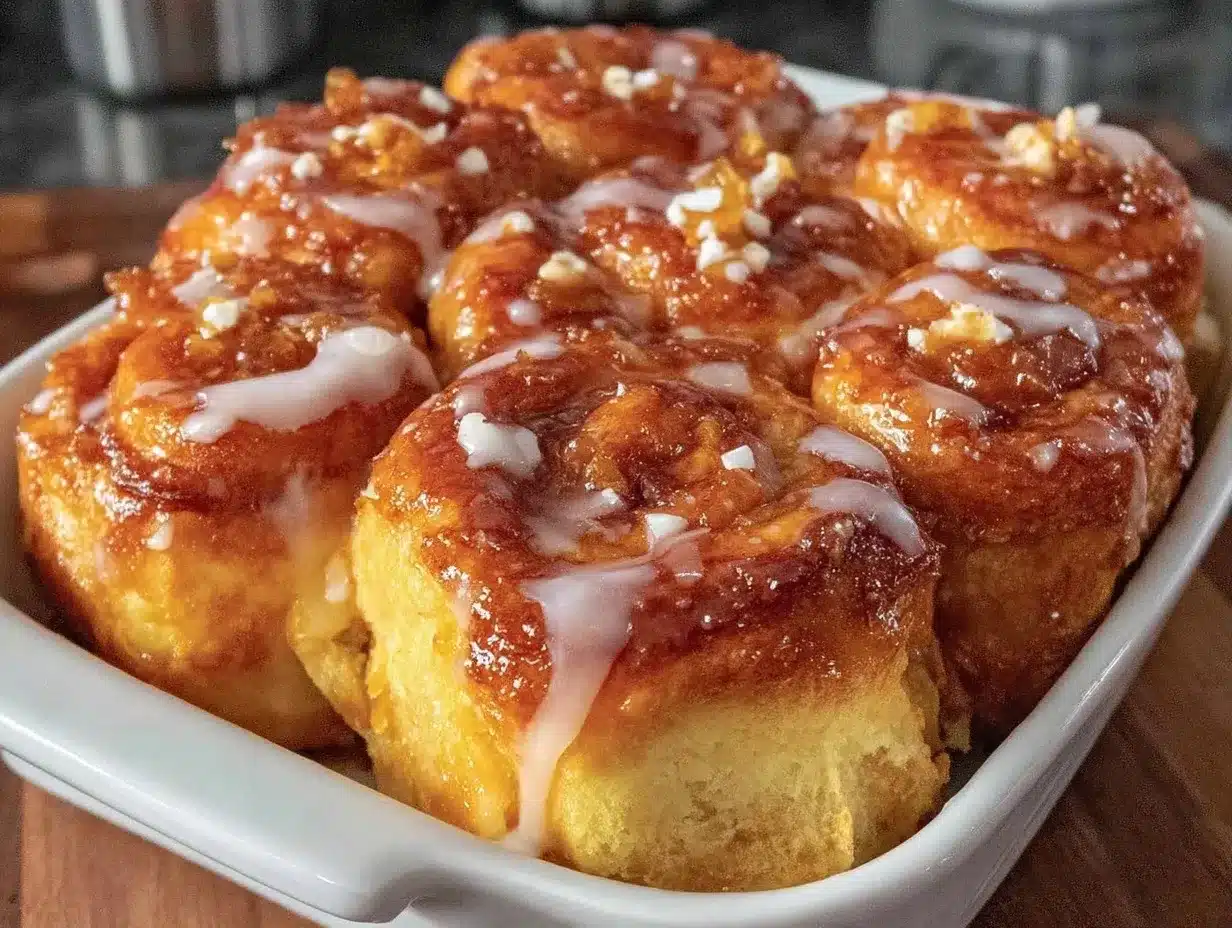
The dough should pull away from the sides of the bowl and feel soft but slightly tacky. If it sticks to your fingers, add a teaspoon of flour. If it feels dry and crumbly, add a splash of milk. It should pass the windowpane test, meaning you can stretch a small piece thin enough to see light through it without tearing.
Preparation Method
Let’s get baking. This process is straightforward, but timing matters. Follow these steps closely for the best results.
- Activate the Yeast: In a small bowl, combine the warm milk and one tablespoon of sugar from the total amount. Sprinkle the yeast on top and stir gently. Let it sit for 5-10 minutes until it becomes foamy. If it doesn’t foam, your yeast might be dead. Start over with fresh yeast.
- Mix the Wet Ingredients: In a large mixing bowl, whisk together the melted butter, the remaining sugar, the egg, the sour cream, and the orange zest. The mixture should look creamy and fragrant. The orange scent should fill the air immediately.
- Combine Dry and Wet: Add the flour and salt to the wet mixture. Stir with a wooden spoon or mix on low speed with a mixer. Add the activated yeast mixture last. Mix until a shaggy dough forms. This takes about 2 minutes.
- Knead the Dough: Turn the dough out onto a lightly floured surface. Knead for 5-7 minutes. Push the dough away with the heel of your hand, fold it over, and repeat. The dough will become smooth and elastic. If it sticks too much, add a little more flour, but be careful not to over-flour.
- First Rise: Place the dough in a lightly oiled bowl. Cover it with a damp towel or plastic wrap. Let it rise in a warm spot for 1-2 hours, or until it doubles in size. A warm oven (turned off) with the light on works well.
- Shape the Rolls: Punch down the risen dough to release air. Divide it into 12 equal pieces. Roll each piece into a ball. Place them seam-side down in your greased 9×13 baking dish. They should be touching each other. This helps them rise upward instead of outward.
- Second Rise: Cover the pan again and let the rolls rise for 30-45 minutes. They should look puffy and jiggly. Preheat your oven to 350°F (175°C) during the last 15 minutes of this rise.
- Bake: Bake for 20-25 minutes. The tops should be golden brown. If they brown too quickly, cover them loosely with foil. Insert a toothpick into the center; it should come out clean.
- Make the Glaze: While rolls bake, whisk together powdered sugar, sour cream, and orange juice. Start with less juice and add more until you reach a drizzling consistency. It should be thick but pourable.
- Glaze and Serve: Let the rolls cool in the pan for 5 minutes. Drizzle the glaze over them while they are still warm. The glaze will soak in slightly, creating a sweet, tangy crust.
Cooking Tips & Techniques
I have made my fair share of dense, brick-like rolls. Here is how to avoid those mistakes. The biggest issue is usually over-flouring. When you knead, only add flour if the dough is truly sticking. Too much flour leads to dry rolls. Another common error is using water that is too hot. Test it on your wrist; it should feel like a warm bath. If it burns, it will kill the yeast.
For consistent results, weigh your flour. Volume measurements can vary wildly. One cup of flour can weigh anywhere from 120 to 150 grams. Using a scale ensures your dough has the right hydration. Also, don’t rush the second rise. If the rolls aren’t puffy before they go in the oven, they won’t rise much during baking. They need that extra time to expand.
Another trick is to brush the tops with melted butter after baking. This keeps them soft and adds another layer of flavor. It’s optional, but I highly recommend it. If your kitchen is cold, the dough will rise slower. Try to find the warmest spot in your house for the rising phases.
Variations & Adaptations
This recipe is very flexible. You can change it up based on what you have or what you crave. For a gluten-free option, use a 1:1 gluten-free flour blend. Note that the dough may be stickier and require more resting time. For a dairy-free version, swap the butter for coconut oil and the sour cream for a dairy-free alternative. The flavor will be slightly different, but still delicious.
You can also add mix-ins. Chopped walnuts or pecans add a nice crunch. Cinnamon sugar can be sprinkled between the layers if you roll the dough out instead of using balls. For a more intense orange flavor, add a teaspoon of orange extract to the glaze. I once tried adding lemon zest to half the batch, and it was a nice contrast for those who prefer tart over sweet.
If you want to make these ahead of time, you can shape the rolls and let them rise in the fridge overnight. In the morning, just pop them in the oven. This is great for busy weeknights when you want a homemade breakfast without the morning rush. The cold dough rises slowly, developing more complex flavors.
Serving & Storage Suggestions
These rolls are best served warm. They are perfect alongside a cup of black coffee or a glass of fresh orange juice. For a complete meal, add some crispy bacon or scrambled eggs on the side. The tangy glaze pairs well with savory dishes too. Presentation matters; dust them with a little extra powdered sugar or fresh orange zest right before serving.
For storage, keep leftovers in an airtight container at room temperature for up to two days. They will stay soft and moist. If you need to keep them longer, freeze them. Wrap individual rolls in plastic wrap and place them in a freezer bag. They will last for up to three months.
To reheat, thaw them overnight in the fridge. Warm them in the microwave for 20-30 seconds. Or, bake them at 300°F for 10 minutes to restore crispness to the glaze. The flavors actually meld and improve after a day or two, making them great for meal prep. Just don’t let them sit out too long, or the glaze will get sticky.
Nutritional Information & Benefits
While these are definitely a treat, they aren’t devoid of nutrition. The sour cream adds calcium and probiotics, which are good for gut health. Eggs provide high-quality protein. The whole wheat flour option (if you choose to use it) adds fiber. Each roll has approximately 250 calories, depending on the size. It’s a moderate treat that can fit into a balanced diet.
They are not naturally gluten-free or dairy-free unless you use substitutes. However, the portion control is easier with homemade rolls. You know exactly what is in them. No preservatives or artificial flavors. This transparency is something I value as a home cook. It allows you to enjoy a sweet breakfast without feeling guilty.
Conclusion
Making soft orange rolls with sour cream glaze is a simple way to bring joy to your morning. It is budget-friendly, delicious, and surprisingly easy. I hope you try this recipe and make it your own. Don’t be afraid to tweak the orange amount or add nuts. Baking is about experimentation.
Share your results with me in the comments! I love seeing how others adapt recipes. Tag me on social media if you post photos. There is nothing better than seeing someone enjoy food they made themselves. Happy baking, and enjoy every sticky, sweet bite.
FAQs
Can I use instant yeast instead of active dry yeast?
Yes, you can. You don’t need to activate it in warm milk. Simply mix it directly into the flour. The results will be the same, though active dry yeast often gives a slightly better rise for beginners.
Why did my rolls turn out dense?
This usually happens if the dough was over-floured or if the yeast was dead. Make sure your milk was warm, not hot. Also, ensure you let the dough rise until it doubles in size, not just a little.
Can I freeze the glaze?
No, the glaze is best made fresh. It separates if frozen and thawed. Make it right before you glaze the warm rolls for the best texture.
How do I store leftover glaze?
Glaze doesn’t keep well. It is best to make only what you need. If you have extra, you can store it in the fridge for a day, but it may thicken. You can whisk in a drop of milk to loosen it.
Can I make these in a bread machine?
Yes, use the dough cycle. Then, shape the rolls and let them rise in the pan before baking. This is a great hands-off method for busy days.
Pin This Recipe!


Soft Orange Rolls With Sour Cream Glaze
- Total Time: 55 minutes
- Yield: 12 servings 1x
Description
Soft, pillowy orange rolls made with sour cream for a rich, moist texture, topped with a tangy orange sour cream glaze. This budget-friendly breakfast is perfect for brunch and feels like a bakery treat without the high cost.
Ingredients
- 2 ½ cups all-purpose flour
- 1 packet (2 ¼ teaspoons) active dry yeast
- ½ cup warm milk
- ½ cup full-fat sour cream
- ½ cup granulated sugar
- 4 tablespoons unsalted butter, melted
- 1 large egg, room temperature
- Zest of 2 medium oranges
- 1 teaspoon salt
- 1 cup powdered sugar (for glaze)
- 2 tablespoons sour cream (for glaze)
- 2 tablespoons fresh orange juice (for glaze)
Instructions
- In a small bowl, combine warm milk and 1 tablespoon of sugar. Sprinkle yeast on top and let sit for 5-10 minutes until foamy.
- In a large mixing bowl, whisk together melted butter, remaining sugar, egg, sour cream, and orange zest until creamy.
- Add flour and salt to the wet mixture. Stir to combine, then add the activated yeast mixture. Mix until a shaggy dough forms.
- Knead the dough on a lightly floured surface for 5-7 minutes until smooth and elastic.
- Place dough in a lightly oiled bowl, cover, and let rise in a warm spot for 1-2 hours until doubled in size.
- Punch down the dough and divide into 12 equal pieces. Roll each into a ball and place seam-side down in a greased 9×13 inch baking dish.
- Cover the pan and let rolls rise for 30-45 minutes until puffy. Preheat oven to 350°F (175°C) during the last 15 minutes.
- Bake for 20-25 minutes until golden brown. Insert a toothpick to check for doneness.
- While rolls bake, whisk powdered sugar, 2 tablespoons sour cream, and orange juice to make a drizzling glaze.
- Let rolls cool in the pan for 5 minutes, then drizzle with glaze while still warm.
Notes
Ensure milk is warm, not hot, to avoid killing the yeast. Weigh flour for best results as volume measurements vary. Do not rush the second rise; rolls must be puffy before baking. Glaze is best made fresh and applied while rolls are warm.
- Prep Time: 30 minutes
- Cook Time: 25 minutes
- Category: Breakfast
- Cuisine: American
Nutrition
- Serving Size: 1 roll
- Calories: 250
- Sugar: 22
- Sodium: 200
- Fat: 8
- Saturated Fat: 4
- Carbohydrates: 40
- Fiber: 1
- Protein: 5
Keywords: orange rolls, sour cream glaze, budget breakfast, homemade rolls, brunch recipes, easy baking, citrus breakfast