There is a specific kind of panic that hits when you realize you forgot to buy dessert for Sunday family dinner. You know the feeling. The clock is ticking, the oven is cold, and your grocery budget is already screaming for mercy. I used to buy that sad, dry box mix cake just to avoid the awkward silence at the table. Then, I discovered the strawberry earthquake cake. It’s not just a dessert; it’s a lifesaver for busy moms and budget-conscious cooks who refuse to settle for mediocre treats.
The first time I made this, I was experimenting with leftover strawberries that were starting to look a little sad in the fridge. I didn’t have time to make a pie or a complicated tart. So, I threw everything into a pan. What came out was a gooey, strawberry-filled surprise that looked like the ground had literally shifted beneath the cake layers. The name stuck, and so did the recipe. Now, it’s my go-to when I need to stretch a few dollars into a five-star dessert.
This make-ahead version is even better. You can mix it up the night before, pop it in the fridge, and bake it fresh while everyone is setting the table. The smell fills the house, and suddenly, you’re the hero of the evening. It’s affordable, it’s easy, and it tastes like a bakery treat without the bakery price tag. Honestly, once you try this, you’ll never go back to expensive store-bought cakes again.
Why You’ll Love This Make-Ahead Strawberry Earthquake Cake
Let’s be real for a second. Most “easy” recipes still require a trip to the store for three obscure ingredients. This one doesn’t. I’ve tested this strawberry earthquake cake over a dozen times, tweaking the ratios until the texture was just right. It’s not just another cake; it’s a strategic move for your dinner table. Here is why this recipe has earned a permanent spot in my weekly rotation:
- It’s a Budget Hero: You likely already have the base ingredients in your pantry. Canned cake mix, strawberry jam, and cream cheese are staples for many of us. By using these affordable items, you create a dessert that feels fancy but costs almost nothing.
- Make-Ahead Magic: The beauty of this recipe is the prep work. You can assemble the entire dish the night before. This means zero stress on the day of the event. You just pull it out, bake it, and serve it. It’s perfect for last-minute potlucks or sudden dinner guests.
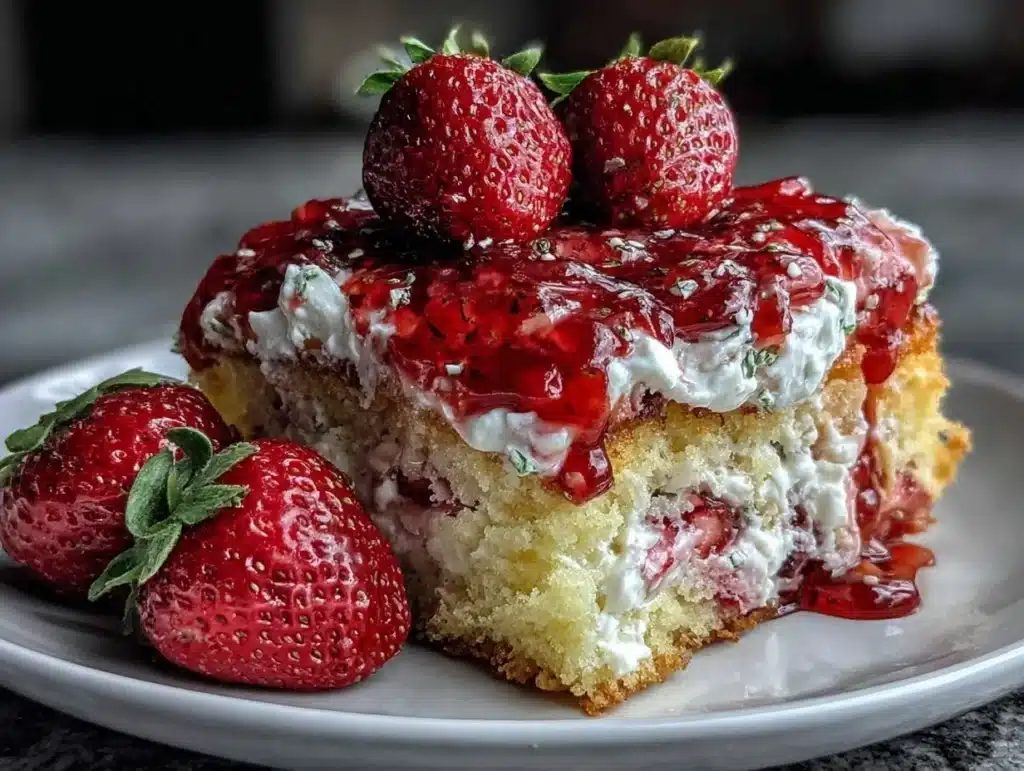
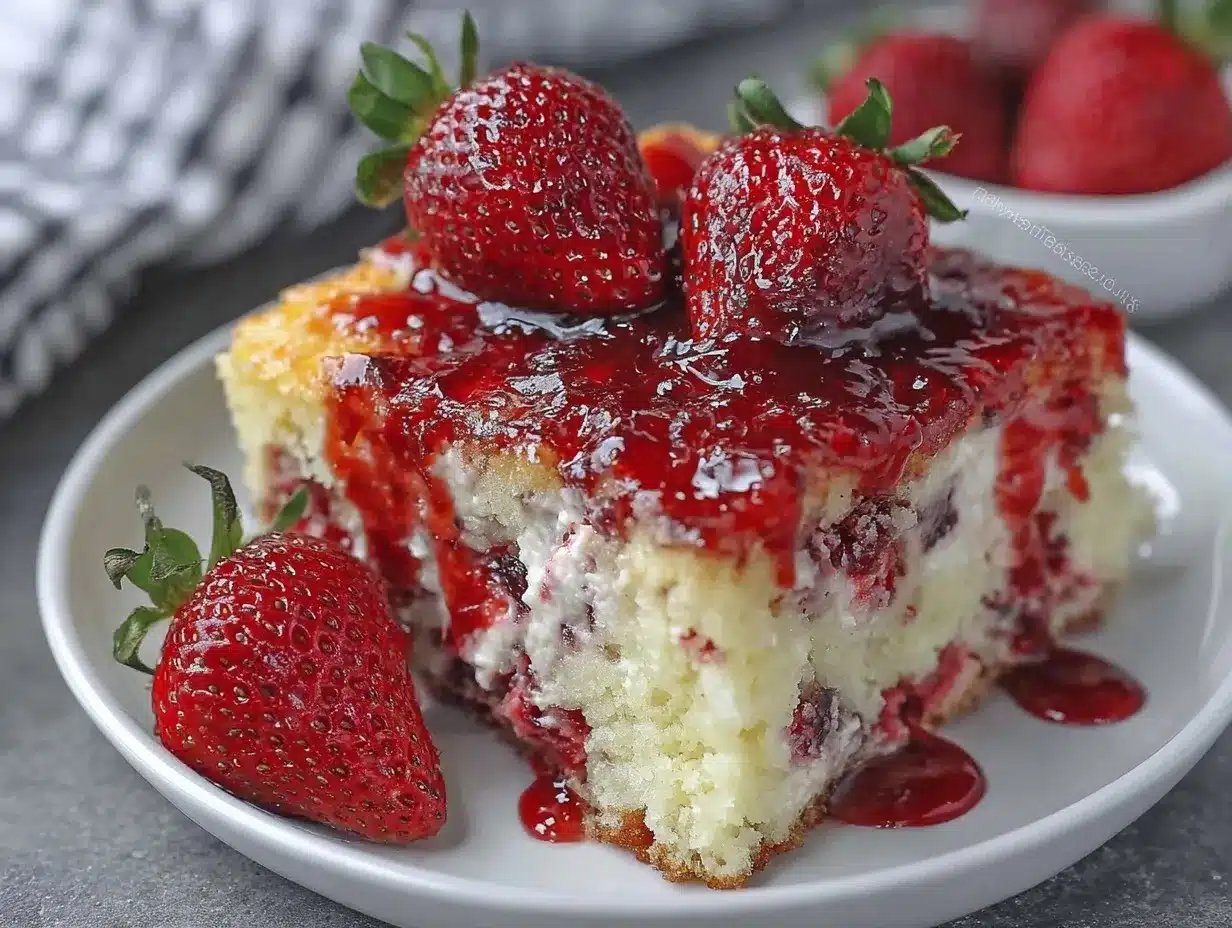
- The Texture Surprise: The name comes from the way the cake “cracks” and settles as it bakes, revealing the gooey strawberry center. It’s visually dramatic and texturally incredible. The contrast between the soft cake, the tangy cream cheese layer, and the sweet fruit filling is next-level comfort food.
- Kid-Approved Flavor: My kids think this tastes like a dessert pizza or a giant cookie. They don’t care that it has a cream cheese layer. They just know it’s sweet, soft, and full of strawberries. It’s a great way to sneak a little dairy protein into their diet without them noticing.
- Zero Waste Cooking: If you have a few bruised strawberries or a jar of jam that’s been sitting in the back of the fridge, this recipe uses them up perfectly. It’s the ultimate way to rescue ingredients that are past their prime but still perfectly good.
This recipe isn’t just about feeding people. It’s about making your life easier. It’s the kind of dessert that makes you close your eyes after the first bite because it’s so satisfying. It’s comfort food reimagined for the busy, budget-savvy home cook. Whether you’re impressing in-laws or just treating yourself, this cake delivers.
What Ingredients You Will Need
This recipe relies on pantry staples and a few simple fresh items to deliver bold flavor without the fuss. The magic here is in the layering. You don’t need fancy flours or expensive extracts. The flavor comes from the combination of the sweet cake, the tangy cheese, and the bright strawberry. Here is what you need to gather:
- Yellow or Vanilla Cake Mix: One standard 15.25-ounce box. I prefer a yellow mix for its rich, buttery flavor, but vanilla works too. Look for a brand that doesn’t have weird additives. The generic store brand is totally fine here and saves money.
- Vegetable Oil: One half cup. This keeps the cake moist. You can use any neutral oil. Olive oil might be too strong, so stick with something mild.
- Water: One half cup. Some people use soda for extra fluffiness, but water is cheaper and just as effective for this dense, gooey texture.
- Eggs: Three large eggs. Room temperature eggs mix better, but if you’re in a rush, straight from the fridge works fine. Just whisk them well.
- Strawberry Jam or Preserves: One cup. This is the “earthquake” part. I recommend a seedless jam for a smoother texture, but preserves with chunks add nice bursts of fruit. Check the clearance aisle for discounted jars.
- Cream Cheese: One 8-ounce block. Softened. This is crucial. If it’s cold, it won’t mix well. Let it sit on the counter for 30 minutes. The tang cuts through the sweetness of the cake.
- Sugar: One third cup. Granulated white sugar works best to mix with the cream cheese.
- Vanilla Extract: One teaspoon. Just a splash to round out the flavors.
- Additional Strawberries (Optional): If you have fresh strawberries that are slightly soft, chop them up and add them to the jam layer. It stretches the fruit flavor even further.
Pro tip: Don’t skip the cream cheese layer. It’s what makes this cake different from a standard dump cake. The fat in the cheese creates a distinct layer that stays creamy even after baking. If you’re watching your budget, look for store-brand cream cheese. It performs just as well in this recipe as the name brand.
Equipment Needed
You don’t need any fancy gadgets to make this strawberry earthquake cake. In fact, the beauty of this recipe is its simplicity. Here is what you’ll need:
- 9×13 Inch Baking Dish: A standard glass or metal pan works best. Glass heats more evenly, which helps the cake bake through without burning the edges. If you only have a metal pan, watch it closely as it may bake slightly faster.
- Mixing Bowls: You’ll need two medium bowls. One for the cake batter and one for the cream cheese mixture. Plastic bowls are great because they don’t break if you drop them (happens more often than you’d think).
- Hand Mixer or Whisk: A hand mixer makes quick work of the cream cheese layer. If you don’t have one, a strong whisk and a bit of elbow grease will do the job. Just make sure there are no lumps.
- Spatula: A rubber spatula is essential for spreading the layers evenly. You want that distinct separation between the cake, the cheese, and the jam.
- Measuring Cups and Spoons: Standard baking tools. Accuracy matters here, especially with the liquid ratios.
I’ve tried using a food processor for the cream cheese layer, but it actually made it too runny. Stick to the bowl and mixer. Also, if you don’t have a 9×13 pan, you can use a 9×9 pan, but the cake will be thicker and might need a few extra minutes in the oven. Just keep an eye on it.
How Do You Prepare the Batter?
Start by preheating your oven to 350°F (175°C). Grease your 9×13 baking dish lightly with oil or non-stick spray. This prevents sticking and makes cleanup a breeze. In your first mixing bowl, combine the cake mix, water, oil, and eggs. Beat this on medium speed for about two minutes. You want a smooth, lump-free batter. Don’t overmix it, or the cake might become tough. Just until combined is perfect.
Now, pour this batter into your prepared baking dish. Spread it out evenly with your spatula. This is your base layer. It should cover the entire bottom of the pan. Set this aside for a moment. The batter is ready, and it smells like sweet, vanilla goodness already.
Creating the Cream Cheese Layer
In your second bowl, combine the softened cream cheese, sugar, and vanilla extract. Mix this until it is completely smooth and creamy. There should be no lumps of cream cheese left. This step is important because you don’t want chunks of cheese in the final product. If you’re using a hand mixer, this takes about one minute. If you’re whisking by hand, it might take a few minutes, but it’s worth the effort.
Once the mixture is smooth, carefully spoon dollops of the cream cheese mixture over the cake batter. Use the tip of a knife or a skewer to swirl the cream cheese into the batter. Do not mix it completely! You want ribbons of cream cheese throughout. This swirling technique creates the marbled effect that makes this cake so pretty and delicious. It’s also what gives it that “earthquake” texture as it bakes.
The Strawberry Surprise
Finally, take your strawberry jam or preserves. Drop teaspoon-sized dollops of jam all over the top of the swirled cake. Don’t spread it out. Just drop it in spots. This is the key to the “earthquake” effect. As the cake bakes, the jam will melt and bubble up through the cracks in the cake, creating those beautiful, gooey strawberry rivers.
Bake the cake for 45 to 55 minutes. You’ll know it’s done when the top is golden brown and the jam is bubbling visibly through the cracks. The center should still be slightly jiggly, not liquidy. Let it cool in the pan for at least 20 minutes before serving. This allows the layers to set and makes it easier to cut clean squares.
Cooking Tips & Techniques
I’ve learned a few things the hard way while perfecting this strawberry earthquake cake. Here are some tips to ensure your success:
- Room Temperature Ingredients: I cannot stress this enough. If your cream cheese is cold, it will clump. If your eggs are cold, they might curdle the mixture. Let everything sit out for 30 minutes before you start.
- Don’t Overmix the Cheese: When swirling the cream cheese into the batter, stop while you still see distinct swirls. If you mix it too much, it becomes a uniform beige color, and you lose the visual appeal.
- Jam Placement: Don’t be shy with the jam. More jam means more flavor. If you’re worried about it being too sweet, balance it with a tart variety of jam or a dusting of powdered sugar after baking.
- Timing is Key: Every oven is different. Start checking your cake at 45 minutes. If the top is browning too fast, cover it loosely with aluminum foil for the last 10 minutes of baking.
- Cooling Down: Patience pays off. If you cut into the cake while it’s piping hot, it might fall apart. Letting it cool allows the structure to set, making for neater slices.
One of my biggest mistakes early on was using a thick, chunky jam. It didn’t bubble up as nicely. If you use preserves, try to mash the fruit slightly before dolloping it on. This helps it spread and create those beautiful cracks.
Variations & Adaptations
While the classic strawberry version is my favorite, this recipe is incredibly flexible. Here are a few ways to twist it:
- Raspberry Swap: Swap the strawberry jam for raspberry jam. The tartness of raspberry pairs beautifully with the cream cheese. It’s a slightly more sophisticated flavor profile.
- Lemon Zest: Add one teaspoon of lemon zest to the cream cheese mixture. It adds a bright, citrusy note that cuts through the richness. It’s especially good in the spring.
- Chocolate Chip: Skip the jam and add a cup of chocolate chips to the cream cheese layer. It turns into a creamy chocolate cake. It’s like a dessert pizza.
- Gluten-Free: Use a gluten-free yellow cake mix. Most brands work well in this recipe. Just check the instructions for liquid adjustments, though usually, it’s a 1:1 swap.
- Reduced Sugar:
I once tried using blueberry jam, and it was delicious, but the color turned a bit muddy. Stick to red or bright fruits for the best visual effect. The “earthquake” look is part of the fun!
Serving & Storage Suggestions
This cake is best served at room temperature or slightly warm. It pairs wonderfully with a cup of coffee or a glass of cold milk. For a special touch, serve it with a dollop of whipped cream or a scoop of vanilla ice cream. The contrast of cold ice cream and warm cake is unbeatable.
Leftovers? Yes, please! Store any leftover cake in an airtight container in the refrigerator for up to three days. It actually tastes even better the next day as the flavors meld together. You can also freeze individual slices for up to two months. Just thaw them in the fridge overnight.
If you’re making this ahead, you can assemble it the night before and keep it covered in the fridge. When you’re ready to bake, just pop it in the oven. It might need an extra 5-10 minutes since it’s starting cold. This is the ultimate make-ahead dessert for busy schedules.
Nutritional Information & Benefits
While this is a treat, it’s not without its merits. The cream cheese adds a bit of protein and calcium, which is a nice bonus for a dessert. The strawberries provide vitamin C and antioxidants. However, it is still a sweet dessert, so enjoy in moderation.
Each slice (assuming 12 servings) contains approximately 350 calories. It’s rich in sugar and fat, but the homemade aspect means you control the quality of ingredients. If you’re watching your carb intake, consider using a low-carb cake mix or reducing the portion size. It’s all about balance.
For those with dietary restrictions, always check the labels of your cake mix and jam for allergens like gluten or nuts. Most standard ingredients are safe, but cross-contamination can happen in manufacturing.
Conclusion
This strawberry earthquake cake is more than just a dessert; it’s a testament to the power of simple ingredients and smart planning. It’s affordable, it’s delicious, and it’s incredibly easy to make. Whether you’re hosting a large gathering or just want a sweet treat for yourself, this recipe delivers. It’s the kind of cake that makes people ask for the recipe, and you’ll be happy to share it.
I encourage you to try it your way. Add some nuts, swap the fruit, or change the cake mix flavor. Make it your own. And when you do, please come back and let me know how it turned out. I love hearing about your kitchen experiments. Happy baking!
Frequently Asked Questions
Can I use fresh strawberries instead of jam?
Yes, you can! Chop fresh strawberries and mix them with a little sugar and cornstarch to thicken them. Then dollop them on top. Just note that fresh fruit may release more water, so keep an eye on the baking time.
Why did my cake not “quake” or crack?
This usually happens if the batter is too thin or if you didn’t dollop enough jam. Make sure your batter is thick and you use generous spoonfuls of jam. The steam from the jam needs to push through the cake to create the cracks.
Can I freeze this cake?
Absolutely. Let it cool completely, then wrap it tightly in plastic wrap and foil. It will keep in the freezer for up to two months. Thaw in the fridge before serving.
Is there a substitute for cake mix?
You can make a scratch yellow cake batter, but it will change the texture slightly. The cake mix provides a specific tenderness that is hard to replicate at home. For best results, stick with the mix.
Can I make this in a bundt pan?
It’s possible, but the layers might not separate as nicely. A 9×13 pan is best for seeing the “earthquake” effect. If you use a bundt pan, the jam will likely sink to the bottom, creating a syrupy base instead of a layered effect.
Pin This Recipe!
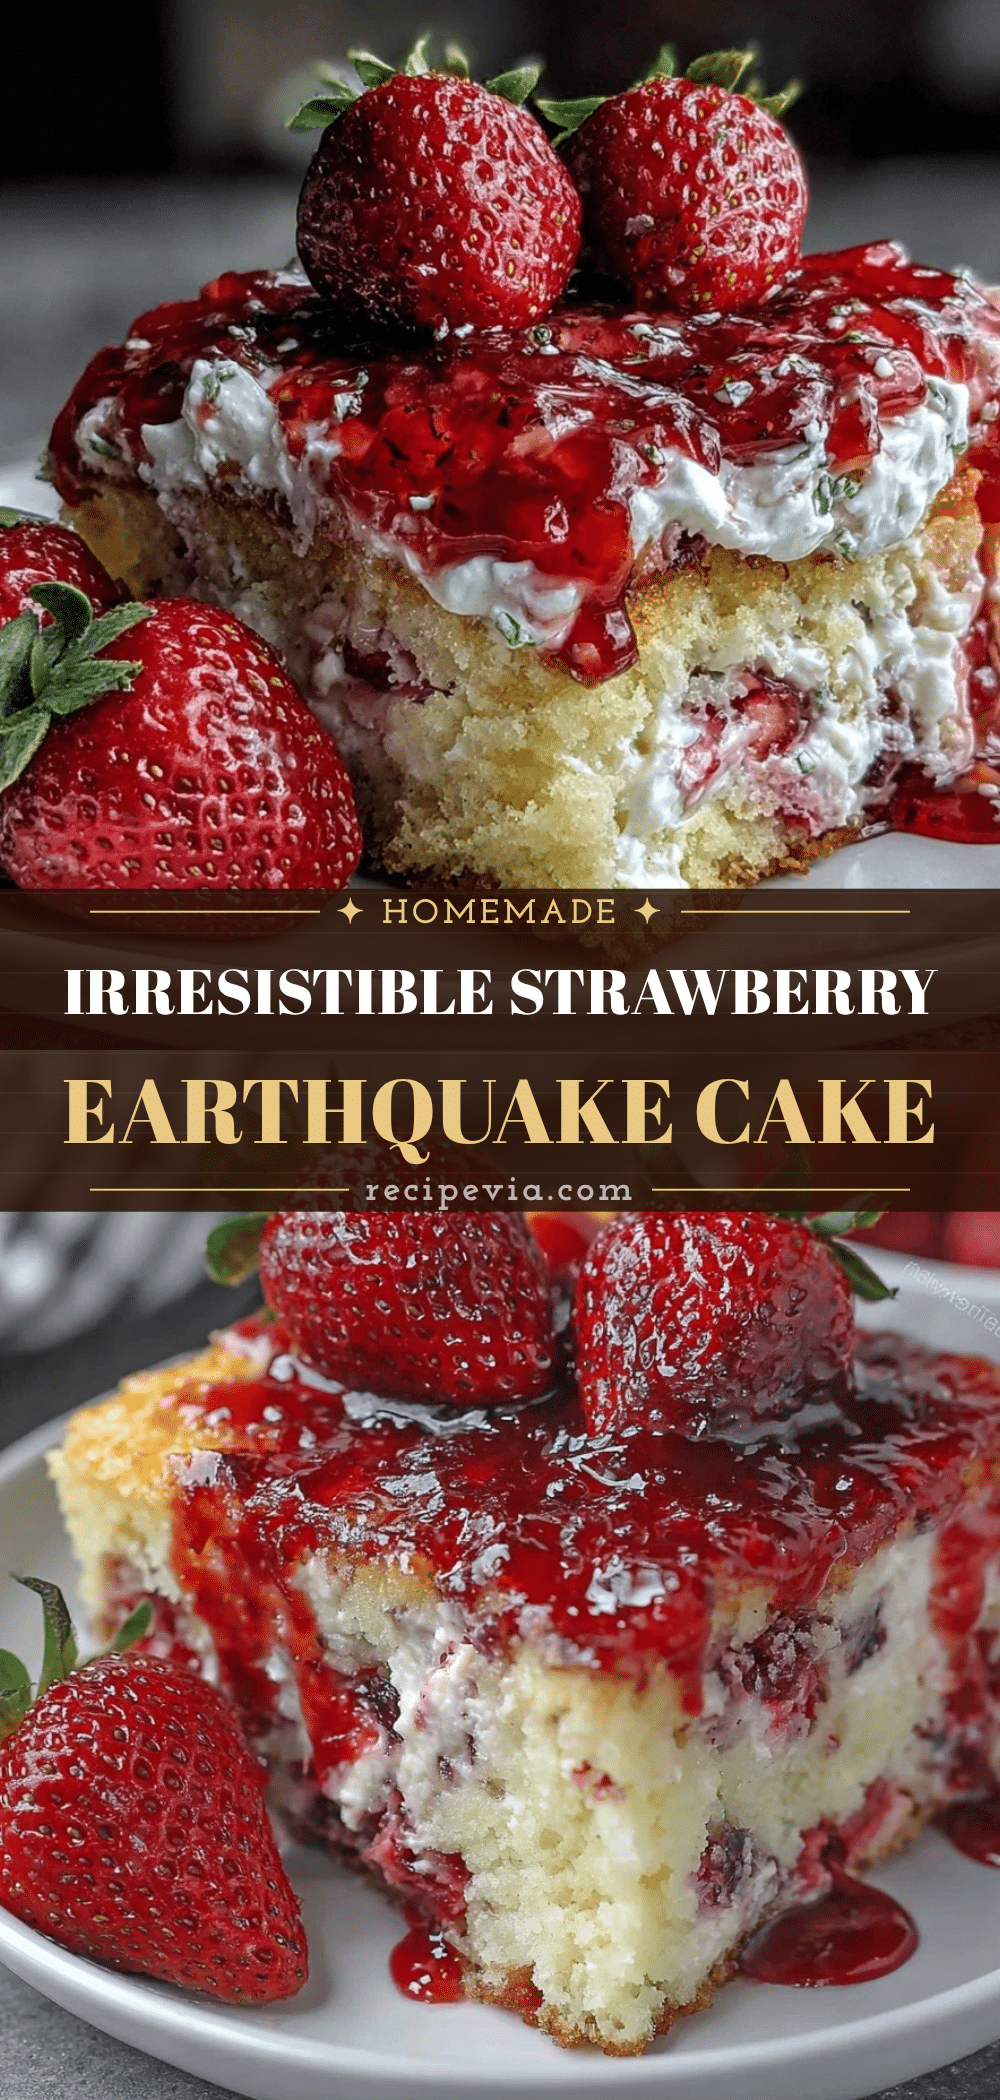

Strawberry Earthquake Cake: Easy Make-Ahead Dessert
- Total Time: 1 hour 10 minutes
- Yield: 12 servings 1x
Description
A gooey, strawberry-filled surprise cake that cracks and settles as it bakes, revealing a tangy cream cheese layer and sweet fruit center. This affordable, make-ahead dessert is perfect for busy cooks and budget-conscious families.
Ingredients
- 1 box (15.25 oz) yellow or vanilla cake mix
- 1/2 cup vegetable oil
- 1/2 cup water
- 3 large eggs
- 1 cup strawberry jam or preserves
- 1 block (8 oz) cream cheese, softened
- 1/3 cup granulated white sugar
- 1 teaspoon vanilla extract
- Additional fresh strawberries, chopped (optional)
Instructions
- Preheat oven to 350°F (175°C) and lightly grease a 9×13 inch baking dish.
- In a medium bowl, combine cake mix, water, oil, and eggs. Beat on medium speed for 2 minutes until smooth.
- Pour batter into the prepared baking dish and spread evenly to form the base layer.
- In a second bowl, mix softened cream cheese, sugar, and vanilla extract until smooth.
- Spoon dollops of the cream cheese mixture over the cake batter.
- Use a knife or skewer to swirl the cream cheese into the batter, creating ribbons without fully mixing.
- Drop teaspoon-sized dollops of strawberry jam all over the top of the swirled cake.
- Bake for 45 to 55 minutes until the top is golden brown and jam is bubbling through cracks.
- Let cool in the pan for at least 20 minutes before slicing and serving.
Notes
Ensure cream cheese and eggs are at room temperature to prevent clumping. Do not overmix the cream cheese layer; distinct swirls are desired. If the top browns too quickly, cover loosely with foil for the last 10 minutes. The cake is best served at room temperature or slightly warm.
- Prep Time: 15 minutes
- Cook Time: 45-55 minutes
- Category: Dessert
- Cuisine: American
Nutrition
- Serving Size: 1 slice
- Calories: 350
- Sugar: 32
- Sodium: 350
- Fat: 18
- Saturated Fat: 7
- Carbohydrates: 45
- Fiber: 1
- Protein: 4
Keywords: strawberry earthquake cake, make-ahead dessert, budget-friendly dessert, easy cake recipe, cream cheese cake, strawberry jam cake, family dinner dessert